Source: How to resize a qcow2 disk image on Linux – Linux Tutorials – Learn Linux Configuration
How to Increase Harddisk Size In Linux VM On Proxmox?
Disable the Cloud sign-in option on Office 2019
Note: Might be easier to install the admx admin templates to Group Policy Editor. See this post for more info
Office 2019 annoyingly wants you to sign in to either a domain or the cloud. It shares the same registry space as Office 2016, so the procedure is:
Preparation:
1. Note that this must be done on a per-user basis, for anyone who logins into the machine. So 2 users on the same machine = do it twice. Or if that user signs into another machine, do it again.
2. Go into one of the Office apps, go to Account, and select “Sign out” & then click Yes when prompted.First, close all Office applications:
Word
Excel
PowerPoint
Outlook
etc.Second, open the Registry Editor: (may need to Run As Admin)
Start > Run > regedit
Third, navigate down the tree:
HKEY_CURRENT_USER
SOFTWARE
Microsoft
Office
16.0
CommonThird, add the SignIn folder:
Right-click on the Common folder
Go to New > Key
Name it “SignIn” (without the quotes)Fourth, add the registry key to disable the sign-in option:
Right-click on the SignIn folder
Go to New > DWORD (32-bit) VALUE
Name it “SignInOptions” (without the quotes)
Set the value to 3Fifth, verify that it worked:
Open up Word
It should no longer have the “Sign in” button in the top bar
Under File > Account, all of the sign-in verbage should be goneIf you ever need to add it back in, just delete the SignInOptions reg key!
Kodi 19 with estuary. Edit shutdown menu/options
On windows with the app (not from the windows store) copy the skin folder from: c:\program files (x86)\Kodi 19\addons\skin.estuary
to: %appdata%\Kodi\addonsgo to %appdata%\kodi\addons\skin.estuary\xml
(create a backup copy of home.xml)
Line 1056 on that file (on notepad click on view -> status bar) would say this:
<param name=”onclick” value=”ActivateWindow(shutdownmenu)” />
Change to:
<param name=”onclick” value=”Quit()” />
You can edit DialogButtonMenu.xml to change the options in shutdownmenu. Edit the “visible” line for options to say no. Make a copy first!
AVR Firmware Duplicator
Overview
This project addresses a simple need: duplicate a working AVR (Arduino) microcontroller firmware: including bootloader, user programming, eeprom, and fuses. You can create one copy or as many as you want. If you have an AVR-ISP device, you essentially have a chip copy machine. While we think about using the ISP for downloading (burning/flashing) the uC, the hardware interface is also capable of reading the information.
Caveat:
You must have access to an AVR-ISP programmer.
I personally use an old UNO running ArduinoISP and a ZIF shield from Adafruit: http://www.adafruit.com/products/462 but one could also use something like:
http://www.adafruit.com/products/46
http://store.atmel.com/PartDetail.aspx?q=p:10500054#tc:description
https://www.sparkfun.com/products/9825
DUPE.CMD – Windows Read & Copy (XP, Vista tested)
ANOTHER.CMD – Multiple copies (Run ONLY after DUPE.CMD)
Example of batch commands for AVRDUDE running under Windows
Examples are all relative to the contents of my %temp% variable – remember to change for your specific environment!
To Read and create a disk file image:
- flash
avrdude -c arduino -P com9 -p ATMEGA328P -b 19200 -U flash:r:%temp%\backup_flash.bin:r
- eeprom
avrdude -c arduino -P com9 -p ATMEGA328P -b 19200 -U eeprom:r:%temp%\backup_eeprom.bin:r
- hfuse
avrdude -c arduino -P com9 -p ATMEGA328P -b 19200 -U hfuse:r:%temp%\backup_hfuse.bin:r
- lfuse
avrdude -c arduino -P com9 -p ATMEGA328P -b 19200 -U lfuse:r:%temp%\backup_lfuse.bin:r
- efuse
avrdude -c arduino -P com9 -p ATMEGA328P -b 19200 -U efuse:r:%temp%\backup_efuse.bin:r
To Write a disk file image into the ATmega328 microcontroller (no line breaks):
- flash
avrdude -c arduino -P com9 -p ATMEGA328P -b 19200 -U flash:w:\Users\owner\AppData\Local\Temp\backup_flash.bin
- eeprom
avrdude -c arduino -P com9 -p ATMEGA328P -b 19200 -U eeprom:w:\Users\owner\AppData\Local\Temp\backup_eeprom.bin
- hfuse
avrdude -c arduino -P com9 -p ATMEGA328P -b 19200 -U hfuse:w:\Users\owner\AppData\Local\Temp\backup_hfuse.bin
- lfuse
avrdude -c arduino -P com9 -p ATMEGA328P -b 19200 -U lfuse:w:\Users\owner\AppData\Local\Temp\backup_lfuse.bin
- efuse
avrdude -c arduino -P com9 -p ATMEGA328P -b 19200 -U efuse:w:\Users\owner\AppData\Local\Temp\backup_efuse.bin
There are no line-breaks in the commands above, the Hackster editor does the line wrapping automatically!
Issues & Notes
I am only describing how to clone the ATmega328P-PU which is used in the Arduino UNO. The process lends itself to any Arduino microcontroller but the exact parameters for the commands will vary. You will need to do research for other processors and other ISP programmers other than the ArduinoISP running on UNO with the Adafruit shield.
Other things you MUST know prior to being successful:
- The USB/Serial communications port for your AVR-ISP burner, generally denoted as comX
- The AVR device name for the Atmel microcontroller, the UNO uses ATMEGA328P
- The exact location where you intend on writing the temporary image files, I used %temp%
- The exact location where you intend on reading the temporary image files… without drive letter
So, let’s get started with the explanation of how this all works!
Software:
Software? If you have the Arduino environment on your PC, the software AVRDUDE is already loaded! If you need software, then download and install from this link: http://arduino.cc/en/Main/Software
Examples of how the AVRDUDE software can be used from a command line is located here:
http://www.nongnu.org/avrdude/user-manual/avrdude_6.html
Batch file (script):
You will need to either type the commands below in a command window under your OS to read a working Arduino microcontroller flash, eeprom, and fuses. The commands create Intel HEX files which represent the exact information contained in the Arduino 328 microcontroller (UNO example.)
Within Windows, the user’s temporary files location is denoted by an environmental variable automatically set and named %temp% and this resolves to a long path (for grins, type this in a command window: echo %temp% and press the ENTER key.) In my case on my particular PC running Vista, the %temp% is equivalent to: C:\Users\owner\AppData\Local\Temp but your path will likely be very different. Now is a good time to open the command prompt (Start / Run… / CMD and press Enter) … on Win8 you can go through the help system to get a run command line, then type CMD to open the environment. Other OS provide the feature, but you will need to research of non-Windows.
There is a BUG (or if not a bug an very annoying feature) of AVRDUDE that allows the reading path to have the “C:” drive in the path variable but the writing path must exclude the “C:”. So, while you can use %temp% for creating the binary files, you must type the path without the C: for the write process. OR, if you are a super DOS freak, you know you can create your own parameter to pass… I will not explain all of this here because I wish to keep this write-up simple..
Here is a link and sample batch file that will give you an idea of how to construct a proper path without the drive letter so that you can completely mechanize the record & write processes without having to hard-code the path:
http://stackoverflow.com/questions/636381/what-is-the-best-way-to-do-a-substring-in-a-batch-file
Sample preamble to create a path without the leading drive letter:
echo OFF
echo.
set tempdir=%TMP%
echo Temporary Directory= %tempdir%
REM echo Modified Path= %tempdir:~2%
set newpath=%tempdir:~2%
echo Temporary Directory= %newpath%
You can use this procedure to quickly create chips with a bootloader and the program and the correct fuse settings and use that chip on a breadboard. And while you cannot de-compile to source code from an Arduino, you could certainly copy whatever program and data is contained in a working UNO microcontroller and insert the chip into another UNO (official or clone) board. Otherwise, it is just fun to know that you can duplicate all aspects of the software environment.
Warning: some non-official “Arduino” boards may come with the lock-bit set in the chip in which case you will NOT be able to copy the flash program. See: http://support.atmel.no/bin/customer.exe?action=viewKbEntry&id=394
– Ray
Code

Replacing the M6800 with an Arduino Nano – Ike Hamill
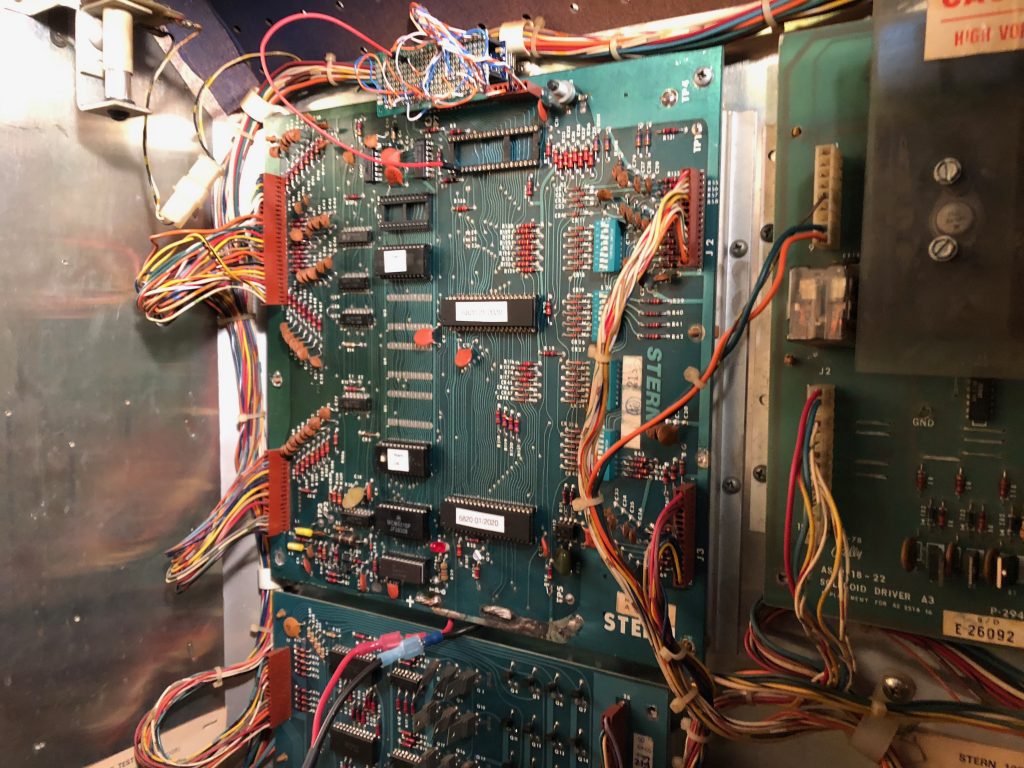
Updating the code on early Bally/Stern Solid State Pinball Games | ballysternos.github.io
Hotel Room Too Hot or Cold? Try This Thermostat Hack | Frommer’s

A travel hack from The Points Guy shows how to override preset thermostat limits in a hotel room. | Frommer’s
In a video posted to the travel site’s YouTube channel, Mayerowitz demonstrates how to override the preset temperature limits on one of the most prevalent kinds of wall-mounted thermostats used in hotel rooms: the Honeywell Inncom model pictured at the top of this post.
According to Mayerowitz, all you have to do to take control of the unit is press the buttons labeled “Display” and “Off” at the same time, and then hold down the temperature control button with the arrow pointing up.
When the letters “LEn” (for Limited Energy) appear on the display screen, you’re in, as computer hackers say in movies. Now you can raise or lower the temperature settings at will using the buttons with the arrows pointing up and down.
the hack may not work on the thermostat in your room. Newer models “have more control over thermostat settings thanks to built-in countermeasures put in place by engineers to get around this hack,” according to the article.
However, the original, cheaper Honeywell version remains common in hotels and motels, particularly chains such as Holiday Inn.
Source: Hotel Room Too Hot or Cold? Try This Thermostat Hack | Frommer’s
Comments
Please log in or sign up to comment.