How to open folders (e.g. by click from desktop) in a new window instead of a new tab?
You can go under File Associations and set your favorite application for folder, when choosing Dolphin, you can go in Application properties and add the command line parameter --new-window before the %u
On Kubuntu 22, Open start menu, find Dolphin, right click and choose “Edit Application”. Then on the Application tab
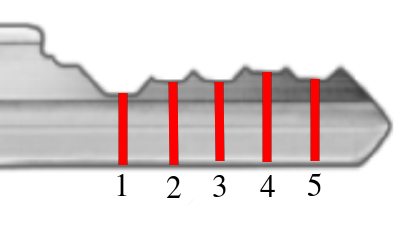
You can measure the root depth of each key bitting and lookup the measurement on the manufacturer specification sheets to determine the key code. The following table provides the bitting depth to key codes for the popular Kwikset key brand used for most home front door locks.
Root Depth
Key Code
0.329″
1
0.306″
2
0.283″
3
0.260″
4
0.237″
5
0.214″
6
0.191″
7
Using calipers, measure each root depth (red lines in the following picture) and compare the measurement to the Kwikset lookup table above. For this picture, red line #1 measured as 0.214” which equals a key code of 6. The complete key code for this key is 63323.
One of the main hiccups in replacing your pinball machine ramp is finding replacement decals. Most of the time, you can actually reuse your decals! Follow along to see how.
Products I used for this tutorial:
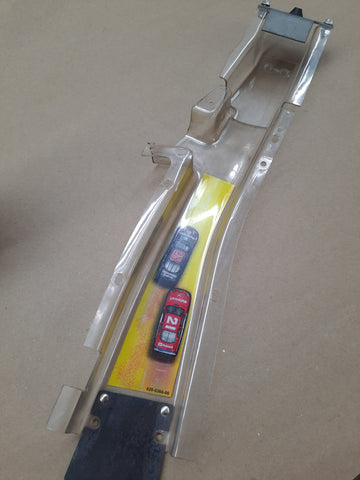
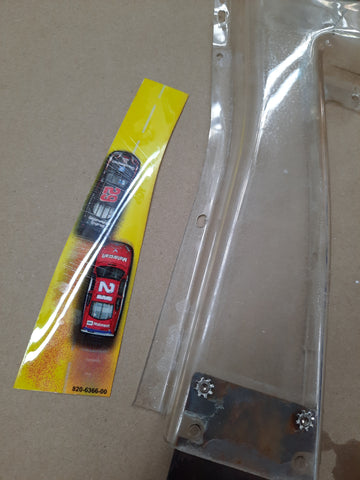
Here we have a Stern Nascar ramp. These Stern decals are actually much thinner than the old Bally/Williams decals, but we can still reuse them!
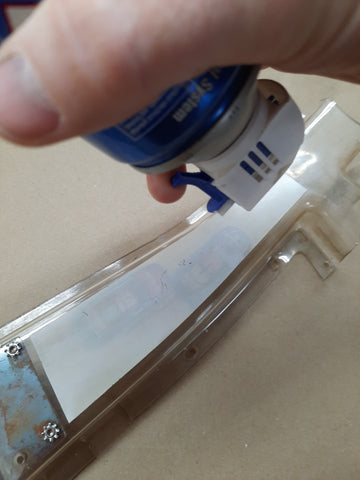
We will use a can of canned air while inverted to freeze the glue holding the decal on.
Invert the canned air, and spray the liquid all over the decal. Then use a fingernail or knife edge to peel a corner away. You should be able to freely begin dislodging the decal. If it stops peeling, stop pulling and reapply the liquid from the canned air.
Once you have the decal removed, use some goof off, goo gone or other cleaner to remove any remaining adhesive from the decal. Once the decal is clean, we can apply new adhesive.
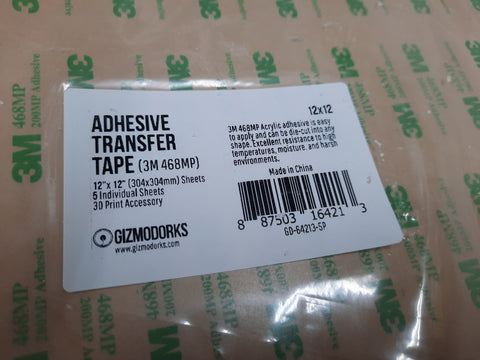
We will use 3M brand 468MP adhesive sheets to reapply the decal. This material is nothing more than an extremely thin layer of adhesive with no substrate. This material is available on Amazon, and will most often be sold under the “Gizmodorks” label.
Peel some of the backer paper off, and carefully apply the decal to the adhesive.
Using a sharp blade, trim the decal away from the rest of the adhesive sheet.
Now you can apply the decal to the finished ramp. Looks like new!
The default Fail2ban installation comes with two configuration files, /etc/fail2ban/jail.conf and /etc/fail2ban/jail.d/defaults-debian.conf. It is not recommended to modify these files as they may be overwritten when the package is updated.
Fail2ban reads the configuration files in the following order. Each .local file overrides the settings from the .conf file:
/etc/fail2ban/jail.conf
/etc/fail2ban/jail.d/*.conf
/etc/fail2ban/jail.local
/etc/fail2ban/jail.d/*.local
For most users, the easiest way to configure Fail2ban is to copy the jail.conf to jail.local and modify the .local file. More advanced users can build a .local configuration file from scratch. The .local file doesn’t have to include all settings from the corresponding .conf file, only those you want to override.
Create a .local configuration file from the default jail.conf file:
sudo cp /etc/fail2ban/jail.{conf,local}
To start configuring the Fail2ban server open, the jail.local file with your text editor :
sudo nano /etc/fail2ban/jail.local
The file includes comments describing what each configuration option does. In this example, we’ll change the basic settings.
Whitelist IP Addresses
IP addresses, IP ranges, or hosts that you want to exclude from banning can be added to the ignoreip directive. Here you should add your local PC IP address and all other machines that you want to whitelist.
Uncomment the line starting with ignoreip and add your IP addresses separated by space:
The values of bantime, findtime, and maxretry options define the ban time and ban conditions.
bantime is the duration for which the IP is banned. When no suffix is specified, it defaults to seconds. By default, the bantime value is set to 10 minutes. Generally, most users will want to set a longer ban time. Change the value to your liking:
/etc/fail2ban/jail.local
bantime=1d
To permanently ban the IP use a negative number.
findtime is the duration between the number of failures before a ban is set. For example, if Fail2ban is set to ban an IP after five failures (maxretry, see below), those failures must occur within the findtime duration.
/etc/fail2ban/jail.local
findtime=10m
maxretry is the number of failures before an IP is banned. The default value is set to five, which should be fine for most users.
/etc/fail2ban/jail.local
maxretry=5
Email Notifications
Fail2ban can send email alerts when an IP has been banned. To receive emails, you need to have an SMTP installed on your server and change the default action, which only bans the IP to %(action_mw)s, as shown below:
/etc/fail2ban/jail.local
action=%(action_mw)s
%(action_mw)s bans the offending IP and sends an email with a whois report. If you want to include the relevant logs in the email, set the action to %(action_mwl)s.
You can also adjust the sending and receiving email addresses:
Fail2ban uses a concept of jails. A jail describes a service and includes filters and actions. Log entries matching the search pattern are counted, and when a predefined condition is met, the corresponding actions are executed.
Fail2ban ships with a number of jail for different services. You can also create your own jail configurations.
By default, only the ssh jail is enabled. To enable a jail, you need to add enabled = true after the jail title. The following example shows how to enable the proftpd jail:
The filters are located in the /etc/fail2ban/filter.d directory, stored in a file with the same name as the jail. If you have a custom setup and experience with regular expressions, you can fine-tune the filters.
Each time you edit a configuration file, you need to restart the Fail2ban service for changes to take effect:
sudo systemctl restart fail2ban
Fail2ban Client
Fail2ban ships with a command-line tool named fail2ban-client which you can use to interact with the Fail2ban service.
To view all available options, invoke the command with the -h option:
fail2ban-client -h
This tool can be used to ban/unban IP addresses, change settings, restart the service, and more. Here are a few examples:
{commands} should be a complete command. If {commands} does not finish a command, the last one will be aborted as if <Esc> or <C-C> was typed. A : command must be completed as well.
You can fix that by adding an extra “Enter” character at the end of your command, which you can enter with:
Ctrl+V, Enter
It will display as a ^M in Vim:
:g/^$/norm :put=range(1,14)^M
(There are ways to avoid having to enter a literal “Enter” in your command. For instance, the :execute command is often used for that.)
But in this case there’s a much simpler solution, which is to drop the :normal altogether and just have :g run :put directly!
:g/^$/put=range(1,14)
The :g command will run an Ex command for each line it matches and :put is an Ex command, so you can just cut the middle man here.
Note that what this command does is append 14 new numbered lines after each blank line in your buffer. Not sure if that’s actually what you intended with it or not.