Generally, Windows manages quite well and this error is nothing too much to concern oneself with, however, for those running a Server or Network Service (for example a printer) this error if left unresolved can become troublesome and disruptive to day to day operations.
Within the error message Microsoft informs the user they can manually adjust some settings to resolve issue and this would be fine but for a few issues that your average punter would not know how to get around.
Thus I thought I’d take the opportunity to explore a method that generally resolves the error once and for all and has some very simple steps anyone can follow if they feel they need to repair the issue manually.
Step 1 — Locate the log and view the error message
- The Windows Event Viewer is a GUI that allows us to view all events recorded by the Windows operating system. This GUI can be accessed by:
- Right-clicking on Start
- Left-clicking on Event Viewer

- As you can see the Event Viewer window is separated into three panes. To access the System logs which record the event we are addressing here do the following:
- In the left pane click on Windows Logs to expand view then select System
- This will open the System logs inside the middle pane. If you’ve not done this before, or in a while, it will take a moment for the logs to populate the middle pane – this is normal.
- Once the middle pane is populated you will see a list of events starting with the most recent ones at the top.
You can scroll through this to locate Event ID 10016, or to speed things up you can specifically filter what is displayed in middle pane by doing the following:
In the right pane click on Filter Current Log
A window pops up with the center field filled in with <All Event IDs>. Simply click inside this field then type 10016 then click OK
The result: Your middle pane now only displays a list of Event ID 10016 DistributedCOM errors with the most recent at the top of list.
Sample Image of views just discussed

- Judging by my long list my computer is near death. You’re all invited to the Service – please bring donations not flowers

All right enough with the jokes – this long list really is nothing to panic about at all – its pretty normal in reality and most events are the same just at different times and dates. As I said earlier Windows generally sorts these out itself too, so the log itself is simply a time stamp of an event that took place that may now be stable. However, we can get to the root of the cause and help prevent it repeating by reading the actual log.
- To read a log you simply double-left-click on the event who’s log you wish to view, in the middle pane. This opens a new window like so:
This window by default opens displaying the General tab
As you can see there is a lot of information some of which you’d need to scroll to read, however if you click the Copy button then open a text editor like Notepad you can paste all the details there for an easier read.
The information above high lighted in the red box is what we want. The things to note here are the following:
1. Source: The source of error was Microsoft Windows DistributedCOM
2. User: The System was attempting to use the DistributedCOM when error occurred.
3. Description: This tells you about the error and gives you some clues.
The application-specific permission settings do not grant Local Activation permission for the COM Server application with
CLSID {8D8F4F83-3594-4F07-8369-FC3C3CAE4919}
and APPID {F72671A9-012C-4725-9D2F-2A4D32D65169}
to the user NT AUTHORITY\SYSTEM SID (S-1-5-18) from address LocalHost (Using LRPC) running in the application container Unavailable SID (Unavailable). This security permission can be modified using the Component Services administrative tool.


- From the above information we’ve establish the Windows System attempted to perform an action involving the Microsoft Windows DistributedCOM server, however permission settings were not granted from Local Activation. We are told the Security Identified (SID) is the user NT Authority\System SID (S-1-5-18) which essentially has the highest privileges allowed for your computer.
We are given a Class ID (CLSID) and also an Application ID (APPID) with the alphanumeric key name which is recorded in your Windows Registry. With those two keys we can work out which application the System was making use of when the error occurred.
Finally, Microsoft informs us we are able to modify the settings which ought to prevent this issue taking place again. More on that later as you’ll soon discover its not quite as simple as the statement makes out.
Step 2 — Working out what Microsoft DistributedCOM file we need to modify
- As we have discovered the CLSID and APPID, and we know their information is stored in the Windows Registry we can very easily get the information we need from the Default value for each of these keys.
Something many may not know though is where precisely in the Registry to look for these keys, and given how important it is not to mess with things you don’t know in case you create a bigger problem, I’ll explain where the keys will be and then how to view the information we need without the need to open the Registry Editor (regedit.exe).
- The CLSID {8D8F4F83-3594-4F07-8369-FC3C3CAE4919} key will be located here:
HKEY_CLASSES_ROOT\CLSID\{8D8F4F83-3594-4F07-8369-FC3C3CAE4919}
- The APPID {F72671A9-012C-4725-9D2F-2A4D32D65169} we are interested in will be located here:
HKEY_LOCAL_MACHINE\SOFTWARE\Classes\AppID\{F72671A9-012C-4725-9D2F-2A4D32D65169}
Both of these keys are located elsewhere in the Windows Registry, however these two locations can provide sufficient information for us to work out which Microsoft DistributedCOM file we need to modify.
The information we need is contained in both of these keys Default value although occasionally one of the keys may not contain this information as we are about to discover in this example. That is not unusual, however it would be very peculiar to discover each key Defaulted to a completely different DistributedCOM file.
To get the information we want without opening the Registry Editor, we will make use of an elevated command prompt console.
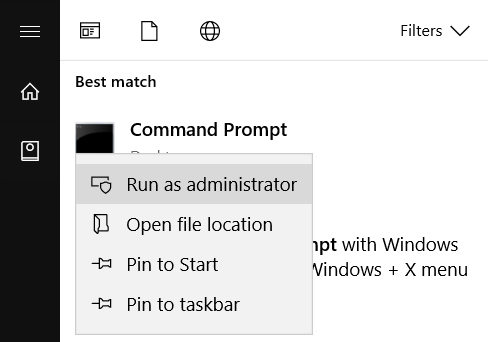
- Right-click on Start
- Left-click on Command Prompt (Admin)
- When the User Account Control pops up click Yes
- You will now see the Administrator: Command Prompt console.
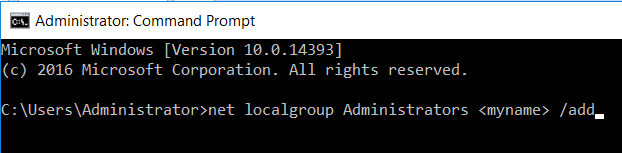
In this console type or copy & paste the following command:
Code:reg query "HKEY_CLASSES_ROOT\CLSID\{8D8F4F83-3594-4F07-8369-FC3C3CAE4919}" /vePress Enter key to execute
Next type or copy & paste the following command:
Code:reg query "HKEY_LOCAL_MACHINE\SOFTWARE\Classes\AppID\{F72671A9-012C-4725-9D2F-2A4D32D65169}" /vePress Enter key to execute
Sample Image of what you’ll see
You can see the CLSID key’s Default value contains a Data value of CDP Activity Store
The APPID key’s Default value has no Data value set
We now know that the Microsoft DistributedCOM we need to modify is the CDP Activity Store component, and that according to Microsoft’s error message we are able to modify.
I’ll explain shortly how to get to this, but to illustrate the suggestion from Microsoft is not quite as simple as that, let’s take a look at the location I’ll be needing to modify.
Sample Image
The area inside the red frame is what we need to modify and according to Microsoft we can. Do you notice the problem?
The fields are grayed out meaning you cannot modify this at all.
The reason for this is because this is a component owned by the System.
The NT AUTHORITY\SYSTEM has the highest privileges on the Local Service Account and normally us mere Administrators, or Local Account users have limited permissions to access things and make changes.
Yet Microsoft told us we can modify, and they were not kidding. To do this we first need to take ownership of both the CLSID and APPID keys in the Windows Registry that we just checked their Default Value Data value.


Step 3 — Taking ownership of the CLSID and APPID keys
- Taking ownership of these registry keys can be done several ways. For those comfortable working with the Registry Editor application, this perhaps is a relatively simple way to achieve the goal.
For those less familiar with the Registry Editor, a safer way to do this is to make use of a Microsoft Tool especially developed for situations like this called SetACL.exe
Now it’s important to realize this tool does not come with your Windows installation per se, but it can be freely downloaded from the following location: https://helgeklein.com/downloads/SetACL/current/SetACL (executable version).zip
As you can see by the URL the download comes as a compressed ZIP folder. Once downloaded, extract the folder by right-clicking and selecting Extract All. This will pop a window up as in sample image below.
Sample Image
This will create a non-compressed folder of the same name. When you open this folder, you’ll see another folder of the same name.
Open that folder and you will see two folders, 32 bit and 64 bit
Simply open the folder that matches your System Type (i.e. whether you have a 64 bit OS or a 32 bit OS, then copy the SetACL file inside the folder and paste it into your C:\Windows\System32 folder.
By doing this you can then use this tool anywhere within an elevated Command Prompt or with an elevated PowerShell console.
The tool itself comes with many useful commands, but for the purposes of this article we’ll be using just two commands on each of the Registry keys identified in our Event ID 10016 Error Description.
So, returning to the Administrator: Command Prompt window type or copy & paste the following:
Code:SetACL.exe -on "HKEY_CLASSES_ROOT\CLSID\{8D8F4F83-3594-4F07-8369-FC3C3CAE4919}" -ot reg -actn setowner -ownr "n:Administrators"Press Enter key to Execute
Code:SetACL.exe -on "HKEY_CLASSES_ROOT\CLSID\{8D8F4F83-3594-4F07-8369-FC3C3CAE4919}" -ot reg -actn ace -ace "n:Administrators;p:full"Press Enter key to execute
Code:SetACL.exe -on "HKEY_LOCAL_MACHINE\SOFTWARE\Classes\AppID\{F72671A9-012C-4725-9D2F-2A4D32D65169}" -ot reg -actn setowner -ownr "n:Administrators"Press Enter key to execute
Code:SetACL.exe -on "HKEY_LOCAL_MACHINE\SOFTWARE\Classes\AppID\{F72671A9-012C-4725-9D2F-2A4D32D65169}" -ot reg -actn ace -ace "n:Administrators;p:full"Press Enter key to execute
Note: The Registry key and its path,
for example: “HKEY_LOCAL_MACHINE\SOFTWARE\Classes\AppID\{F72671A9-012C-4725-9D2F-2A4D32D65169}”
in the above commands should be replaced with the Registry key and path relevant to your error which you are wanting to take ownership of.Don’t forget to leave the speech marks in too!
Sample Image
You can see in above image all commands completed successfully
Note: If you’d prefer to manually take ownership via the Registry Editor, but are not sure how, just ask in the Discussion section of this article and I’ll post instructions on how to do this.


Step 4 — Go modify the DistributedCOM component
- If you recall earlier, the Description in our Event ID 10016 log told us we can modify the Security Permissions using the Component Services Administrative Tool.
I posted an image of that tool opened earlier with the section we needed to use to modify things all grayed out; hence the need to take ownership of those two registry keys first.
Now we can open this tool and make the necessary modifications.
- To open the Component Services Administrative Tool by:
- Right-clicking on Start
- Left-clicking on Control Panel
- Selecting to View by Large icons
- Left-clicking on Administrative Tools
- Left-clicking on Component Services
This opens the following window

- As you can see this is divided into three panes. Now remember we are trying to make a modification to a DistributedCOM or DCOM for short, so this is what we need to open. To do that:
- In left pane you want to expand the Component Services until you see a list of subfolders, once of which is named DCOM Config
- In the left pane simply left-click on DCOM Config folder
- The middle pane will now populate with a long set of Component Services. To make it a little easier to view in the top toolbar click on View > Detail
TIP: Now I don’t know about you but that was a lot of clicking to get to here. Here’s a tip for the future to speed things up a little:
1. Right-click on Start and select Run
2. In the run dialog type dcomcnfg then click OK
3. Now just expand and click DCOM Config as before then View > DetailWhich ever way you choose to open this the end result is:

- By selecting View > Detail we can now see a list of components and their Application ID (AppID). This is useful as if you recall our Event log gave is the AppID {F72671A9-012C-4725-9D2F-2A4D32D65169} so we know this is what we want to find here.
We also discovered via the Class ID that the CDP Activity Store was something to look out for.
One of the common ones seen in errors like this is the Immersive Shell and if you scrolled down the list you’d soon see it there along with its AppID. However, as you’ll discover if we scroll this list looking for CDP Activity Store it is not present at all, although there is a CDP Reference Host listed.
Could that be what we need? No, take a look at its AppID. It does not match the one we are seeking. So now what?
Microsoft for some bizarre reason chose not to include the basic function Find with this tool so we cannot go Ctrl F and hope to search for our AppID, however, if you look at that list carefully you will see it is listed in Alphanumeric order which thank goodness will save a lot of time.
As the component CDP ACtivity Store was not present we must now scroll to bottom of components and instead seek the AppID Registry key instead.
And look there it is!

- To modify the Security Permissions simply right-click and choose Properties
This will open the Properties window for our AppID Registry key.
In this window select the Security tab
Sample Image
As you can see its no longer grayed out. Thus we can now make the necessary modifications.

- In the top panel ‘Launch and Activation Permissions’ simply:
- Check the radio button next to Customize, then
- Click this panels Edit button
This will open the following:
If you take a look in the Group or user names field you will either see the member your error message mentioned or not.
If you could see the member then left-click it and in the lower field you would check the Allow box next to Local Activation as that is what our error mentioned :
The application-specific permission settings do not grant Local Activation permission …This same error message though also mentioned something else important:
… to the user NT AUTHORITY\SYSTEM SID (S-1-5-18) …In my example this user is not listed at all and that is why the error is being triggered. So we need to add this user and grant it permissions.

- To add the user click the Add button you can see in image above. This will open a new window like so:
We need to type in the empty field our missing User which in this example is the user SYSTEM. After entering the user name we then click the Check Names button. This will underscore the user name. Now click OK
Sample Image


- Having done the above we are back to the previous window. In the top pane click on SYSTEM which you just added.
- Now in the bottom pane place a check in the Allow box next to Local Activation
Sample Image
When you’ve checked the box click OK which will close this window and return you to the Properties window.
In the Properties window also click OK
Now close the Component Services tool

Step 5 — Final Tidy Up
At this point if you wish you could restore permissions for the two registry keys back to their original status. In my case the CLASS ID was owned by the SYSTEM, and the AppID was owned by TrustedInstaller, so to change it back I’d enter the following commands in an elevated command prompt:
SetACL.exe -on "HKEY_CLASSES_ROOT\CLSID\{8D8F4F83-3594-4F07-8369-FC3C3CAE4919}" -ot reg -actn setowner -ownr "n:SYSTEM"
SetACL.exe -on "HKEY_LOCAL_MACHINE\SOFTWARE\Classes\AppID\{F72671A9-012C-4725-9D2F-2A4D32D65169}" -ot reg -actn setowner -ownr "n:NT SERVICE\TrustedInstaller"
After each command you press Enter key to execute
Sample Image
Note: At this point if you are not intending on restarting computer, then you will need to restart the Service for these changes to take effect.

Simply press Windows key and S then type Services and press Enter key.
Scroll down and right-click the Service and select Restart
That’s it – all done!
Source: How to link a CLSID and APPID to a program – Microsoft Community