Category Archives: Software

Beyond basic modal editing. Using vim’s command-line mode.

Vim is famous for its fabulous modal editing. Its normalinsert, and visual modes quickly become magic in the hands of an able user. But many are unaware or ignore the existence of vim’s command-line mode with its Ex commands.

Whereas vim’s normal and insert mode work in the locale of your cursor, vim’s command-line mode can help you deal with things far from your cursor. Or as Drew Neil puts it in his Practical Vim book,

Vim’s Ex commands strike far and wide.

Let’s look at a few of them.

Copy (copy, t), move (m), and delete (d)

We’ll start by copying, moving, and deleting lines. You access vim’s
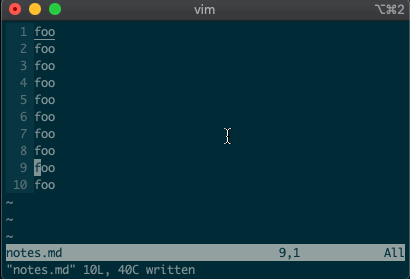
 command-line mode with :. Copying, moving, and deleting can be intuitive. What would you say this command did?

:3copy5

If you guessed copy line three to line five, then you got it!

Copying line 3 to 5 with `:3copy5`

t is shorthand for copy (think copy to). So :3t5 does the same thing as the command above.

Do move and delete work the same way? You betcha.

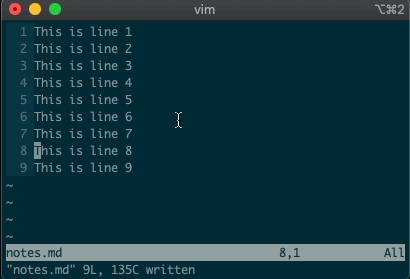
Try moving a line with :3m5.

Moving line 3 to 5 with `:3m5`

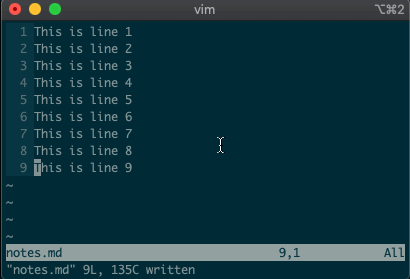
Now try deleting a line with :3d.

Deleting line 3 with `:3d`

Acting on ranges

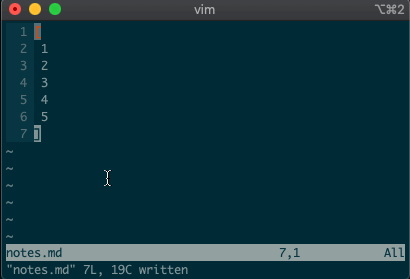
But that’s not all. Ex commands aren’t limited to single lines. They can act on ranges. Want to move lines 3-5 to line 8? You got it:

:3,5m8

Moving lines 3-5 to 8 with `:3,5m8`

Relative ranges

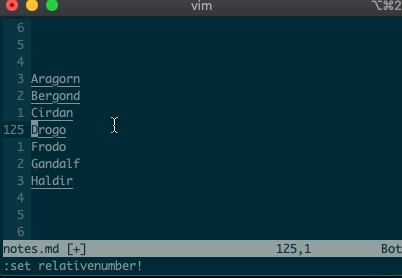
I know what you’re thinking, “But what if I’m on line 125, and I use relative numbers!” Not to worry. Vim has a range for you too:

:-2,+1d

Delete the two previous line and the next line with `:-2,+1d`

The visual range

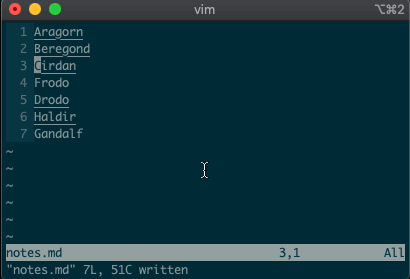
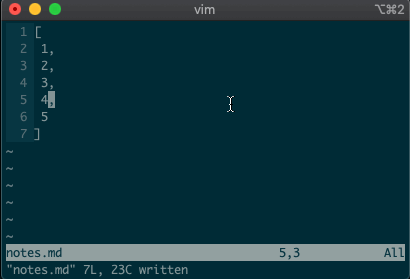
What about using a visual selection as a range? If you’re like me, you’ve probably used vim to help you sort lines by visually selecting them and typing :sort. Did you ever notice the range vim inserts for us? It’s the special visual selector range:

:'<,'>sort

Visually select lines 3-7 and sort with `:sort`

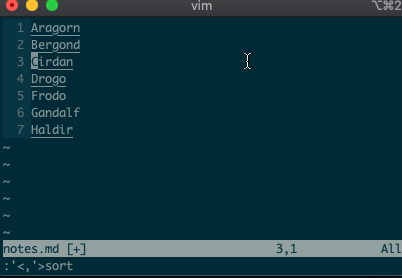
Want to perform other actions on that same visual block? The visual selector range ('<,'>) continues to operate on the previous visual selection, even when that range is no longer selected! Let’s delete the lines we sorted last time:

:'<,'>d

Delete lines previously visually selected with `:'<,'>d`

Want to learn more about the visual selector range? As it turns out, ranges can be delimited by marks, and '< and '> are just a couple of special marks. That opens ranges to a world of possibilities! Try '{,'} for paragraphs and '(,') for sentences.

Search and replace

Perhaps you’ve never stopped to think about the magical incantation you use to search and replace words in a file. Well, we can finally uncover the mystery: s will replace things (think substitute). Want to replace foo with bar on line 3?

:3s/foo/bar/g

Replace foo with bar on line 3 with `:3s/foo/bar/g`

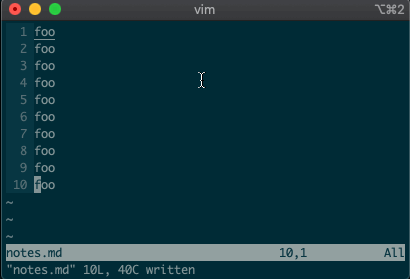
What if you want to search and replace in the entire file? We can use a range from the first line to the end of the file: 1,$, or even better, we can use vim’s shorthand for the whole file: %. Go ahead. Type it in, and see the magic work:

:%s/foo/bar/g

Replace foo with bar on all lines with `:%s/foo/bar/g`

Repeat a normal command

In addition to modal editing, vim is known for its ability to repeat the last command with .. Maybe you delete a line with dd, then you realize you need to delete the next one. No need to press dd again, just type . and you’re good to go.

But what about repeating the same command across many lines? What would you do if you wanted to append a comma at the end of each line in a list? Ex commands are here to help you:

:2,5normal A,

Append comma on lines 2-5 with `:2,5normal A,`

Repeat the last Ex command

. repeats the last normal command. What if we want to repeat the last Ex command? We can do that too.

@:

Repeat last command with `@:`

If you’ve ever used macros in vim, you might notice this looks like a macro for the : register. Find that interesting? Take a look at your registers (:reg) and see what you find for :.

What next?

I hope you see the power of Ex commands. Instead of typing 2Gdd to go to the second line and delete it, you can delete it from afar with :2d. And instead of going to line 3, visually selecting lines 3-5, yanking them, going down to line 10, and pasting the lines with 3GVjjjy10Gp, you can just do it from anywhere in the file with :3,5t10.

If you want to learn more, I highly recommend Drew Neil’s Practical Vim book, or take a look at the excellent documentation for different vim modes and for the Ex commands copymovedeletesubstitute. And if you want to dig deeper, help is just a :help away.

Until next time!

Source: Beyond basic modal editing. Using vim’s command-line mode.

QuickBooks 2016 License Registration

QuickBooks 2016 License Registration
Step 1. To start the procedure please follow these instructions:
1. Double-click on the icon labeled QuickBooks 2016 on the desktop. (You will be
prompted with a small window labeled, “QuickBooks 2016 License Agreement.”)
2. Click on View License Agreement. (When the webpage opens you can simply close
the window which will bring you back to the small window labeled “QuickBooks
2016 License Agreement.”)
3. Click “Yes” to accept the terms of the Intuit End User License Agreement.
Step 2. QuickBooks will now need to be registered. If QuickBooks is already registered
(press F2 to confirm) you may skip to Step 3.
1. Close the registration window by clicking on the “X” in the upper right-hand corner
of the registration window.
2. Click Help in the top right corner. (SEE BELOW)
3. Select About QuickBooks 2016 at the bottom of the list.

4. Next you will see a green QuickBooks 2016 splash screen appear listing your
license information. On this screen you will need to press and hold the following
sequence on the keyboard: CTRL (control) key, “R”, and then “P.”

5. On this screen enter the validation code:  and click Next.

How to Reset QuickBooks Registration

How to Reset QuickBooks Registration


QuickBooks requires users to register their software within 30 days of purchase or download in order to continue using it. During the registration process — either online or by phone — QuickBooks provides a registration number the user enters into a file named “qbregistration.dat.” The registration number activates the software, allowing its continued use. If the DAT file becomes corrupted or fails to appear, you can write or rewrite it from scratch using any plain text editing app.

Error Message During Installation

Step 1

Look for the “qbregistration.dat” file. If you are using Windows Vista, 7 or 8, QuickBooks stores the file in the “C:\ProgramData\Common Files\Intuit\QuickBooks” folder.

Step 2

Right-click the “qbregistration.dat” file. Select “Rename” and renamy the file “qbregistration.old.”

Step 3

Launch a plain text editor app like Notepad and paste the following code into a blank text document:

xx.x”> version”>

YES 000-000 0000-0000-0000-000 000073adbf3f

Step 4

Replace the “xx.x” in the first line of code with “24.0” if you are using QuickBooks 2014. If you are using QuickBooks 2013. Use “22.0” if you have QuickBooks 2012. Type “atom” if you have QuickBooks Simple Start. Type “pro” if you have QuickBooks Pro.

Step 5

Replace “000-000” in the second line of code with your QuickBooks installation product number.

Step 6

Replace “0000-0000-0000-000” in the third line of code with your QuickBooks license number.

Step 7

Save the file as “qbregistration.dat” and select “All Files” in the Save as Type option. This ensures that no extra code is added to the file and that the file remains a DAT file without being changed to a DOC or TXT file. Save the file in the same folder where your “qbregistration.dat” was originally.

Prevent new window from hiding addons in toolbar | Firefox Support Forum | Mozilla Support

Hi Jerl, you don’t need to explain the problem to me. I still have dom.disable_window_open_feature.toolbar set to true in about:config although it no longer does anything. As support forum volunteers, we don’t get special access to developers, we have to get in line like everyone else.


Did I post this before? The reason the toolbar buttons are hidden is a built-in style rule. So as an unofficial community developed workaround, you can inject an overriding style rule to make them visible again.

Setting this up is a little bit involved, so please set aside 10 quiet minutes to work through it.

(For anyone who already has a userChrome.css file set up, you just need to add the rule under (A) to your file.)

(A) Select and copy the following style rule code

/* Override Hiding of Toolbar Buttons in Limited Feature Windows */
*|*:root[chromehidden~="toolbar"] .chromeclass-toolbar-additional {
  display: -moz-box !important; /* default is display: none */
}

(B) Generate and download a userChrome.css file

Open the following page and paste the above rules into the editor, replacing the sample rule:

https://www.userchrome.org/download-userchrome-css.html

Then click “Generate CSS File” and save the userChrome.css file to your computer. (See first attached screenshot)

Use the downloads list on the toolbar to open the downloads folder directly to the new userChrome.css file. (See second attached screenshot)

Minimize that file browser window for later reference.

(C) Create a new chrome folder in your profile folder

The following article has the detailed steps for that (#1, #2, and I recommend #3)

https://www.userchrome.org/how-create-userchrome-css.html

I have videos for both Windows and Mac in case the text is not clear.

(D) Move the userChrome.css file you downloaded in Step B into the chrome folder you created in Step C

(E) Set Firefox to look for userChrome.css at startup — see step #6 in the above article.

The next time you exit Firefox and start it up again, it should discover that file and apply the rule.

Success?

Once you start tweaking the interface this way, you’ll probably find more and more things you want to do. I suggest bookmarking the pages where you get the code for future reference because changes to Firefox may break them and it’s easier to request an update if you can find the source.

Source: Prevent new window from hiding addons in toolbar | Firefox Support Forum | Mozilla Support

A brief guide to Mozilla preferences – Mozilla | MDN

What is a preference?

A preference is any value or defined behavior that can be set (presumably, one setting is preferable to another). Preference changes via user interface usually take effect immediately. The values are saved to the user profile (in prefs.js), for both Firefox and Thunderbird.

A preference is read from a file, and can call up to four methods: pref()user_pref(), sticky_pref() and lockPref(). All preferences files may call pref()user_pref() and sticky_pref(), while the config file in addition may call lockPref().

Source: A brief guide to Mozilla preferences – Mozilla | MDN

How to Create a userChrome.css File

How to Create a userChrome.css File

Updated May 24, 2019; Originally posted by jscher2000 on November 5, 2017.

Creating your userChrome.css file is the first step on your quest to make over Firefox’s interface. It takes a couple of minutes, but it’s important to take your time and get it right so Firefox loads and applies your style recipes on the first try.

At startup, Firefox will check for the userChrome.css file in a particular location: a folder named chrome inside your currently active profile folder. The profile folder is where all of your current settings and add-ons are stored. (If you want to learn more about that folder, see “Profiles — Where Firefox stores your bookmarks, passwords and other user data” on Mozilla Support.)

Here’s how you set that up (full details below):

  1. Open your currently active profile folder
  2. Create a new folder named chrome
  3. Create a desktop shortcut (alias) to the chrome folder for easier future access
  4. Make sure your OS is set to show you file extensions like .txt and .css
  5. Create a new text file inside the chrome folder named userChrome.css
  6. Change a preference in Firefox so it looks for your files at startup (in Firefox 69+)

Source: How to Create a userChrome.css File