All posts by smarc
Locking preferences – MozillaZine Knowledge Base
This article describes how to prevent specific settings from being modified from inside Firefox, Thunderbird, or SeaMonkey. This is commonly known as locking preferences.
Microsoft Store – Generation Project (v1.2) [by @rgadguard & mkuba50]
Online link generator for Microsoft Store.
Enter the link from the Microsoft Store and click on the checkbox – to get all available links.
Source: Microsoft Store – Generation Project (v1.2) [by @rgadguard & mkuba50]
Quicken 2013 blocks
%ProgramFiles% (x86)\Quicken\BindContent.exe
%ProgramFiles% (x86)\Quicken\RPMMigration\MigrationTool.exe
%ProgramFiles% (x86)\Quicken\QuickenOLBackupLauncher.exe
%ProgramFiles% (x86)\Quicken\qw.exe
%ProgramFiles% (x86)\Quicken\techhelp.exe
%ProgramFiles% (x86)\Quicken\qwul.exe
Make Scrolling Bearable Again
Disable Scroll Jacking, a Chrome Extension to disable scroll jacking.
Source: Make Scrolling Bearable Again
Prusa Knowledge Base | Bed Level Correction
This calibration is for advanced users only!
Together with the Mesh Bed Leveling, the Bed Level Correction is an important feature designed to allow users to compensate for even the slightest imperfections in the first layer. It allows to virtually raise or lower the heatbed on the Left, Right, Front and Back sides, essentially enabling you to have a different Live Adjust Z value on each of the four sides of the heatbed. This feature is most beneficial if you frequently need to use the entire area of the heatbed.
Before you start the calibration, make sure there is nothing between the steel sheet and the heatbed.
How to use Bed Level Correction
Starting from firmware 3.5.2, the adjustment limit is +/- 100 microns (μm) instead of +/- 50 microns (μm) in the previous versions. Even 20 microns can make a huge difference, so when using this function, make small incremental changes. Just like in the Live-Z adjust, negative values lower the nozzle closer to the heatbed.
Before we begin, clean the entire surface of your heatbed with 90% (or more) isopropyl alcohol.
- Run a First Layer Calibration to get a good baseline calibration.
- Download and slice this test model for your printer version using the Prusa Slicer’s default PLA settings, 0.20 mm layer height.
- Print the g-code prepared in the previous step with a PLA filament (ideally light and opaque color). The print is just one layer high and takes up most of the printable surface. You do not have to print the entire file, stop the print as soon as the differences in layer height across the plate are obvious.
- Evaluate where the layer is too squished and full of scars and where there are gaps in between the lines. In the photo below, the lines are way too squished in the top-right corner, and the nozzle is too far away in the bottom-left.
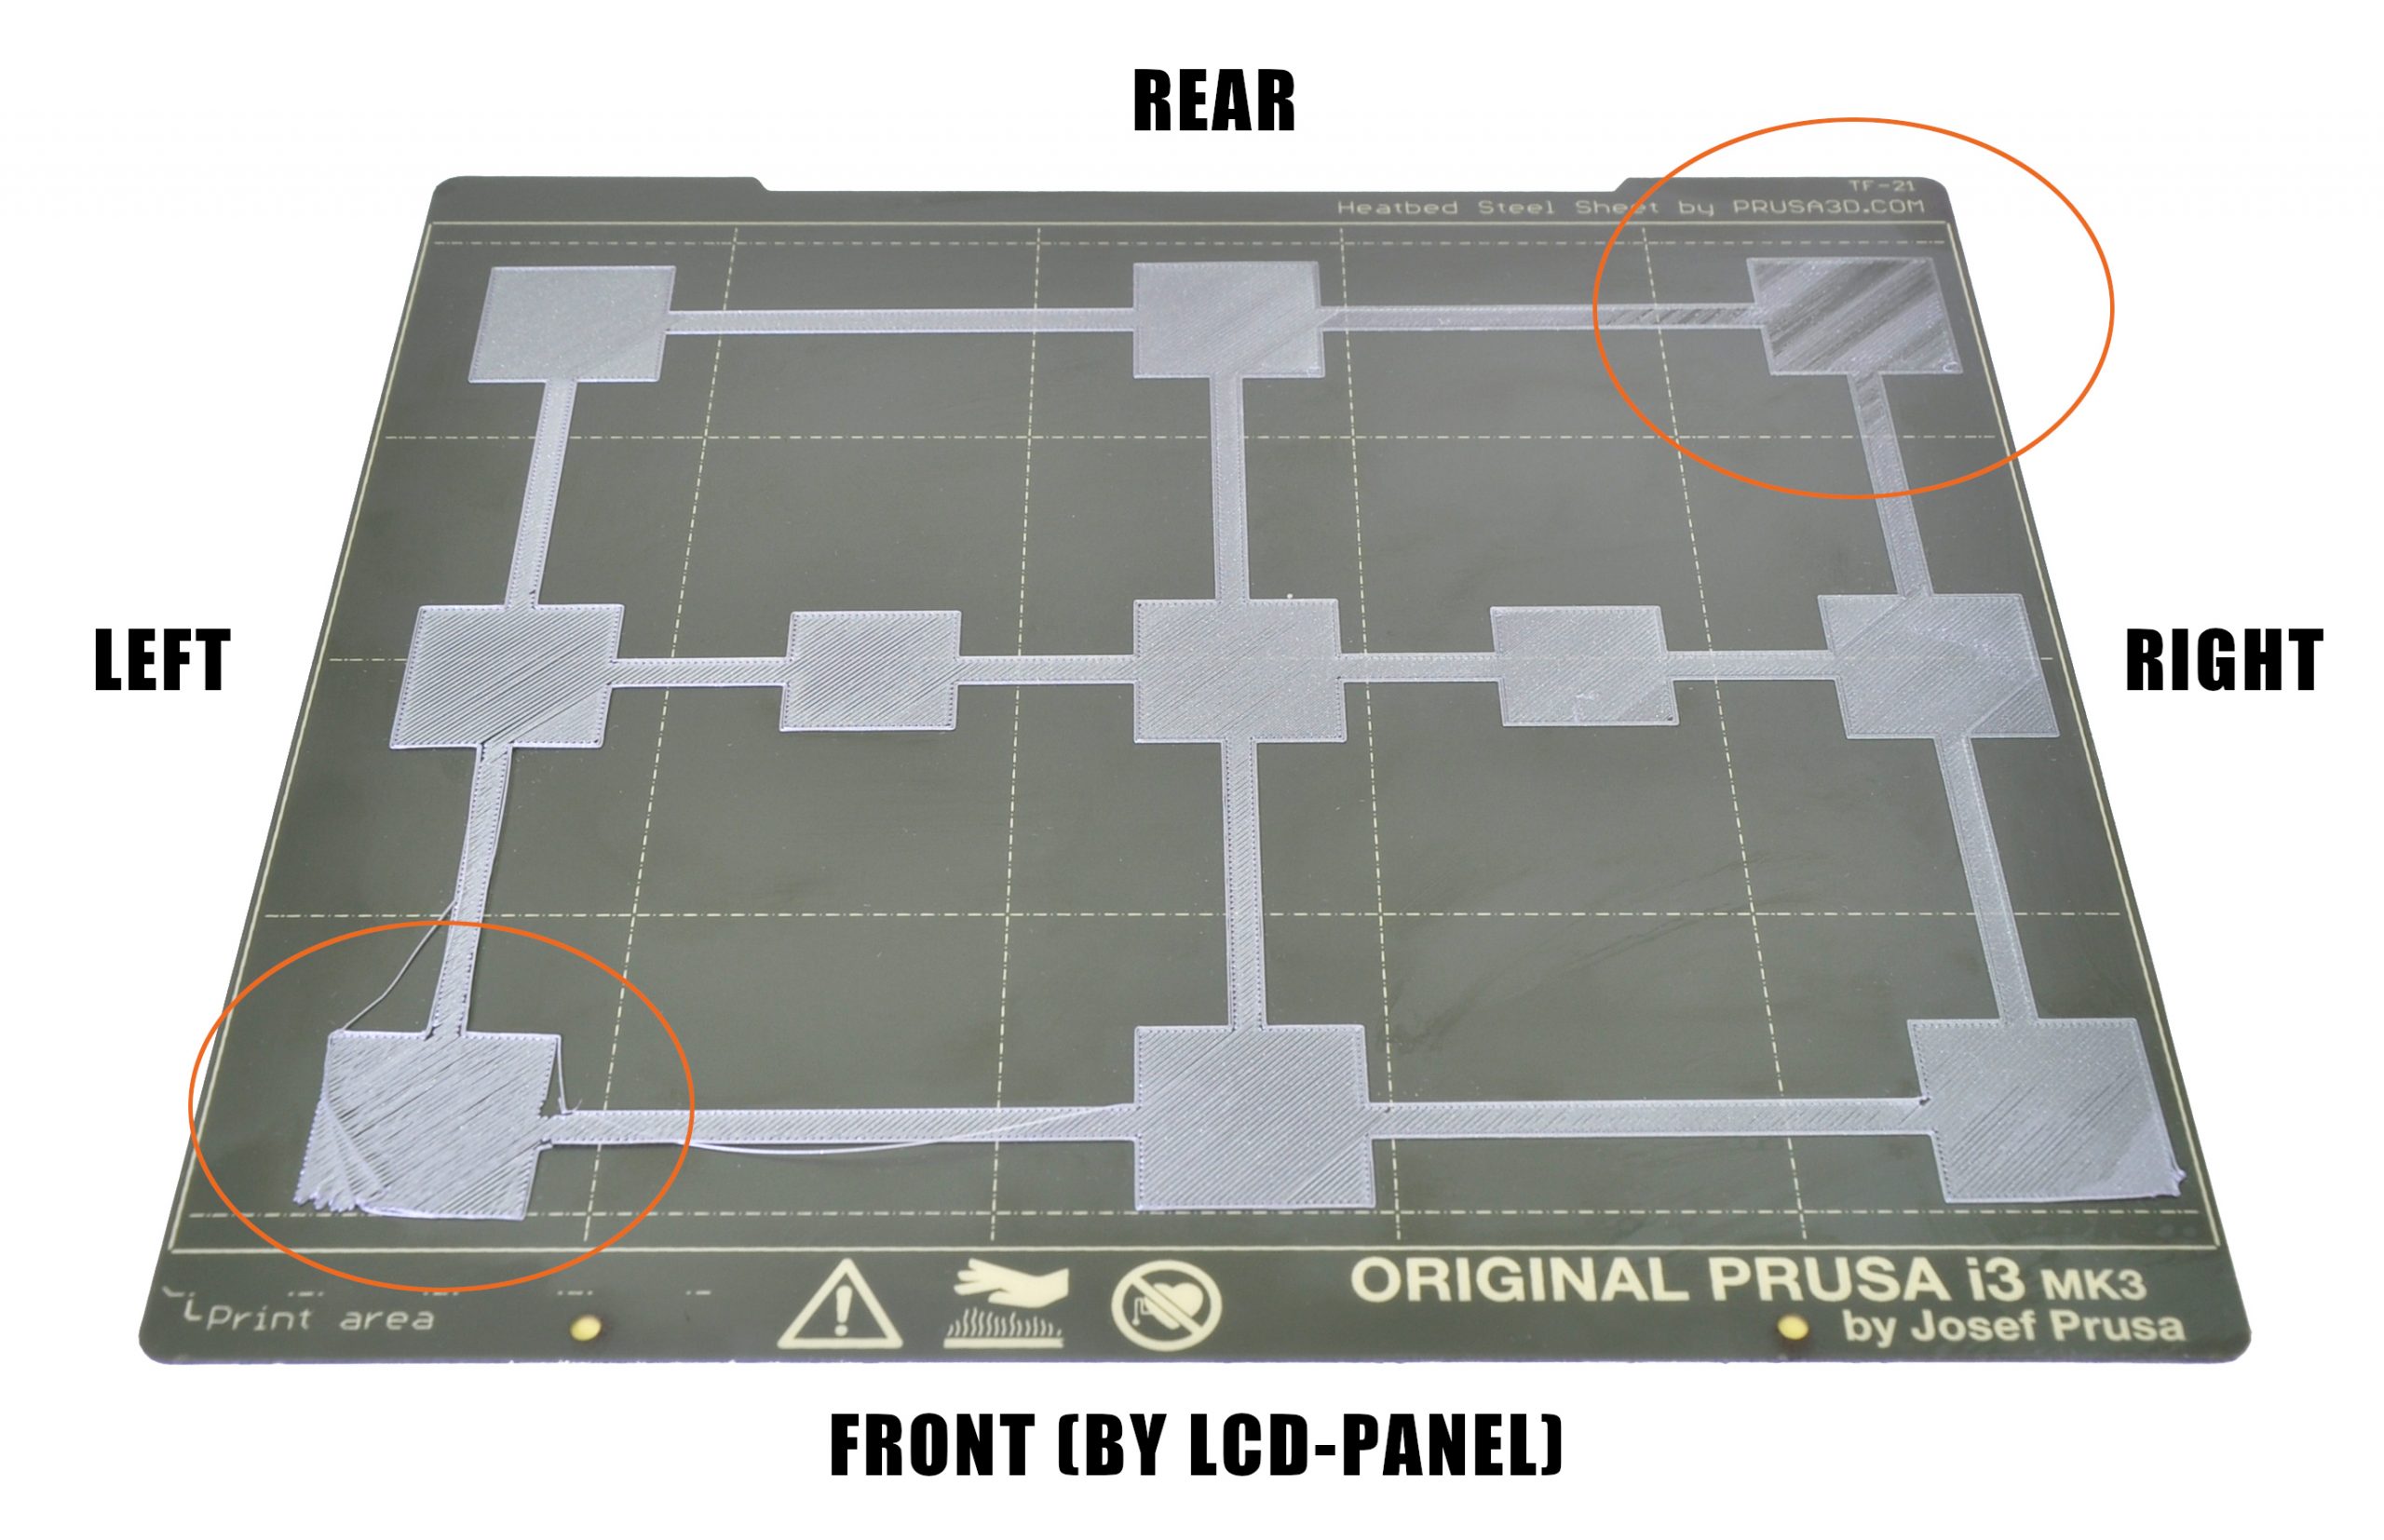
In the example above you want to adjust a minus-value on the left, bringing the nozzle closer and a plus-value on the right, moving the nozzle away. You may also need to adjust the distance front and back, but do a test print after adjusting the left and right side.
- Go to the LCD Menu -> Calibration -> Bed level correction. There, you can adjust Left/Right/Front/Rear values (understood from your point of view, as you are looking at the printers LCD).
- Edit the values, we suggest going in steps of +/- 10. These values will be added to the baseline Live Z value set in step 1. Remember, a negative value will decrease the distance between the nozzle making the layer more squished. A positive value will increase the nozzle-bed distance, curing the scars on your first layer.
- Repeat steps 3 to 6 until you are satisfied with the result (photo below for inspiration).
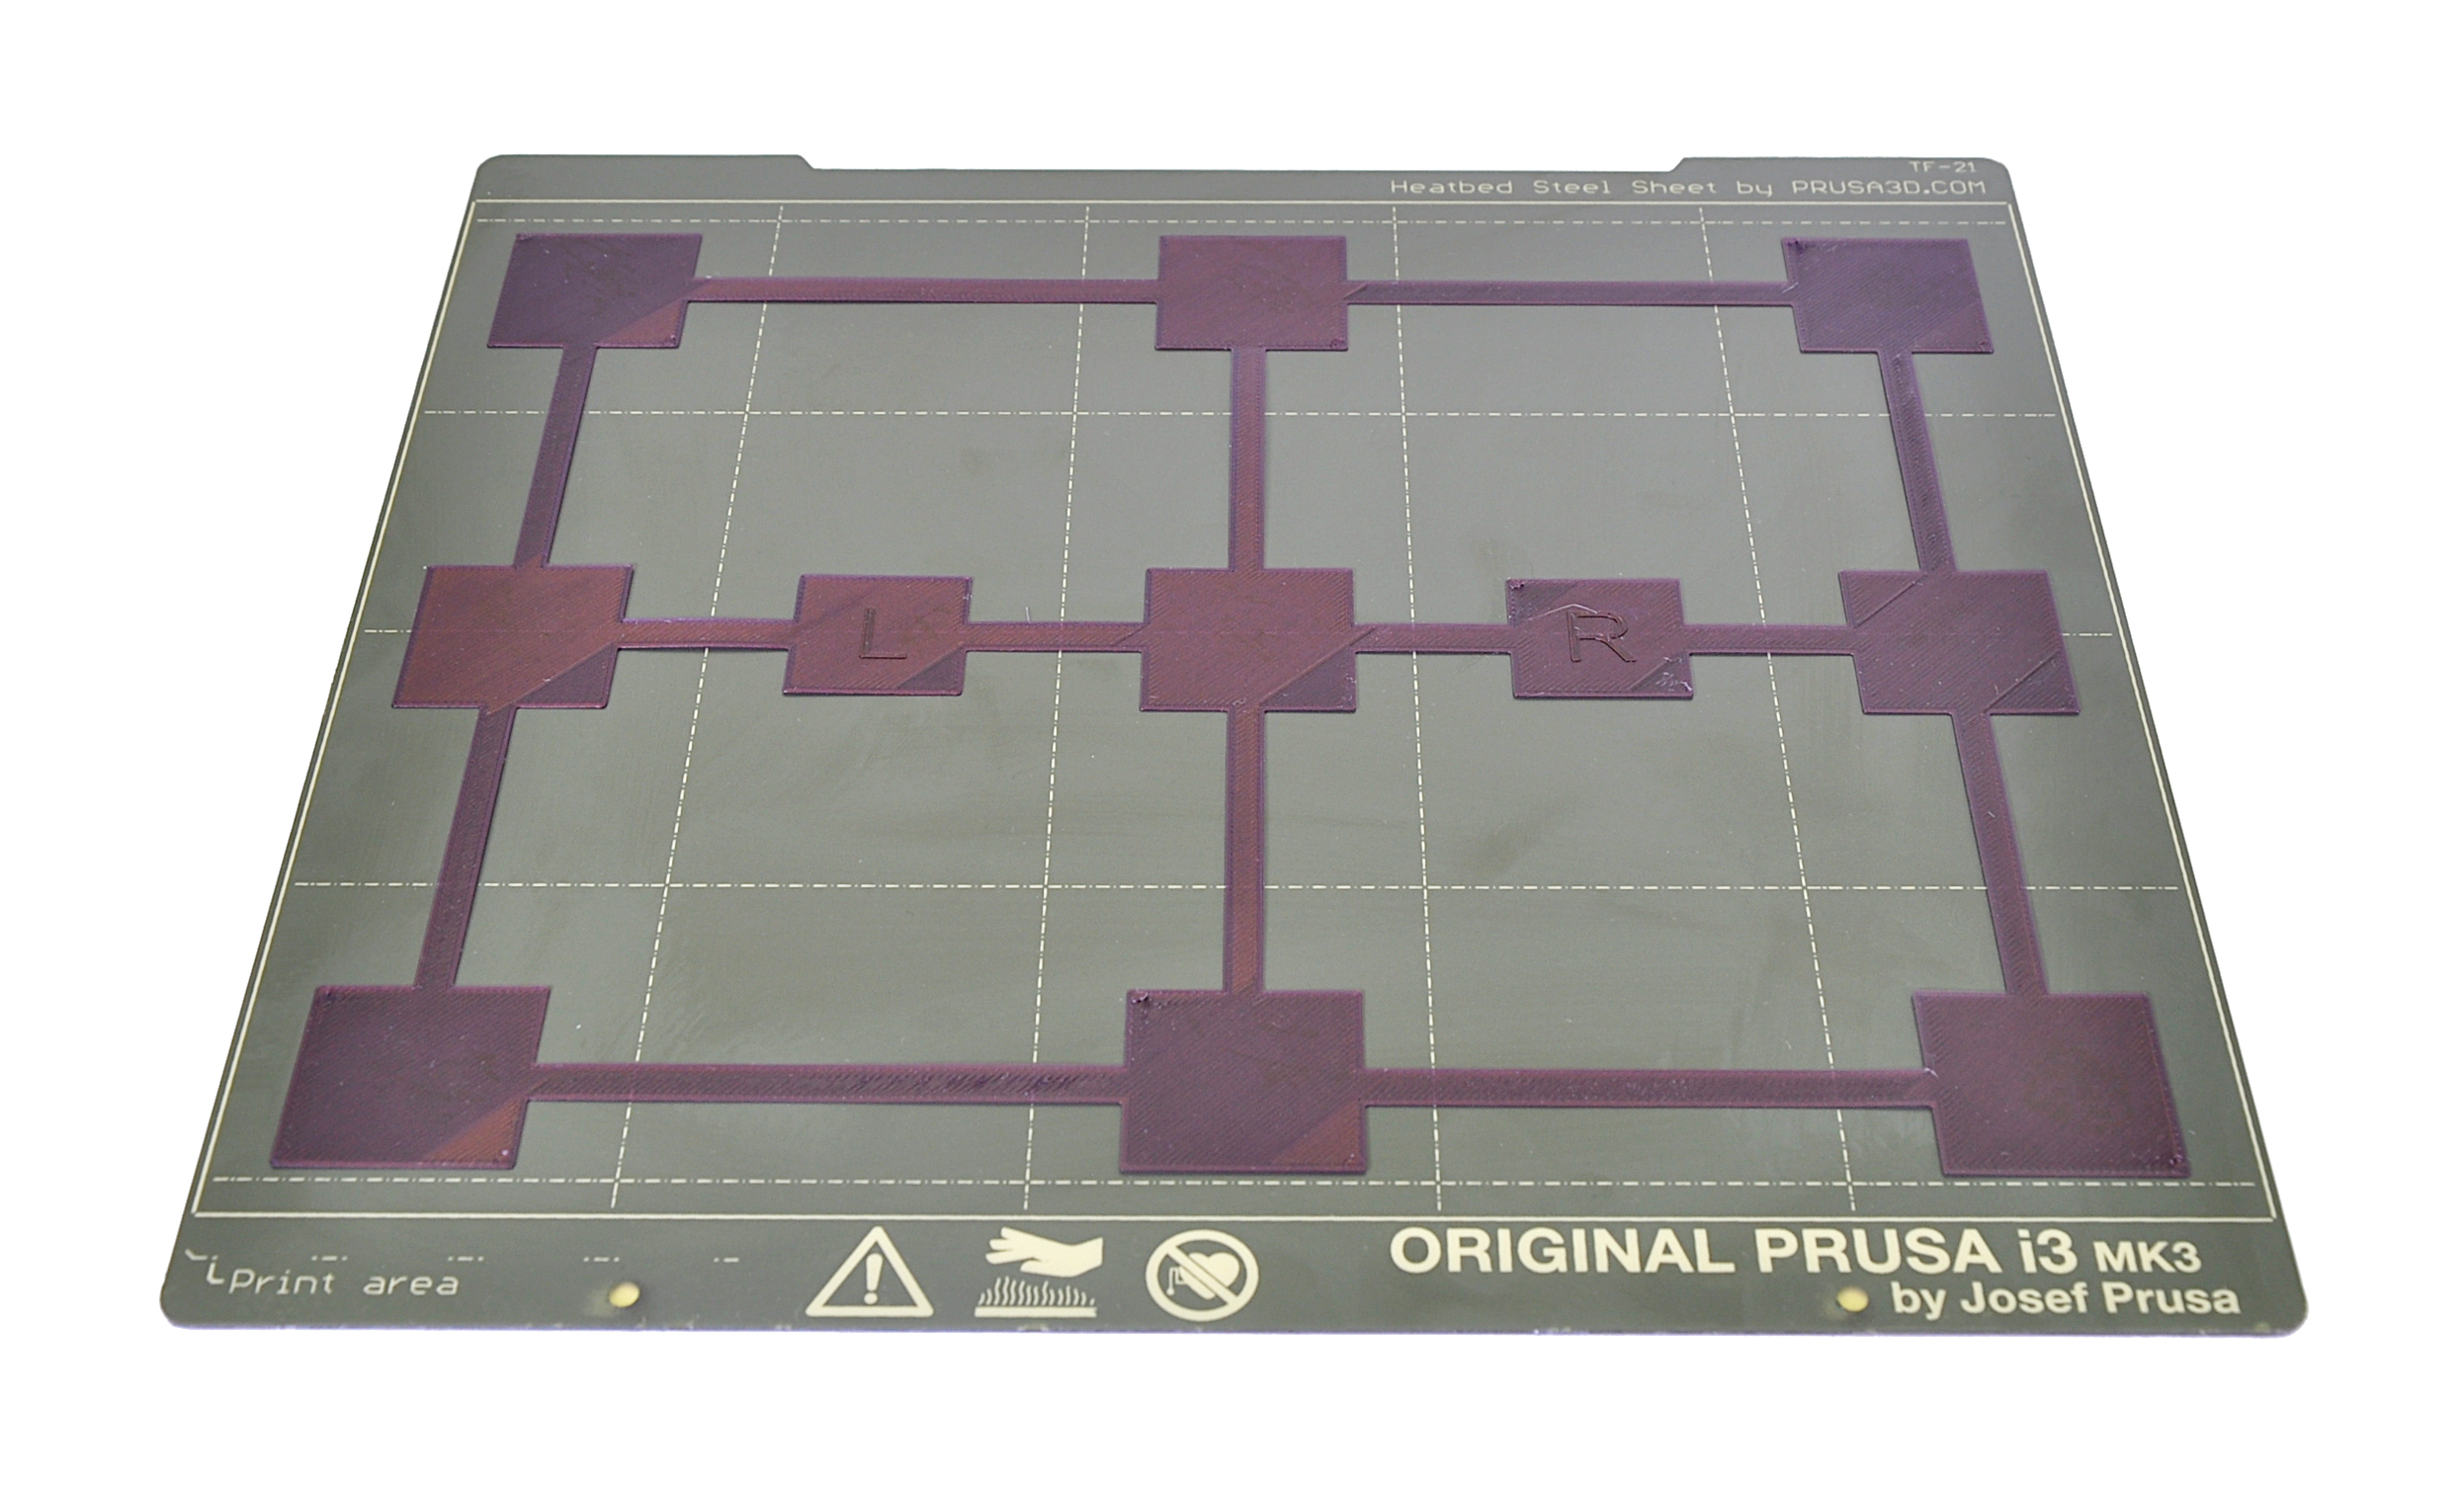
For example, let’s say your Live adjust Z value is -1.000 and that the layer is too squished in the rear and that you see gaps between the lines on the right side.
- Rear: you need to enter a positive value (at the end it will be 25 for example) to make the layer less squished
- Right: you need to enter a negative value (at the end it will be -10 for example) to make the layer more squished
The Bed Level Correction values are reset to 0 every time you start the Calibration Wizard or the XYZ calibration. Once you find your ideal values, write them down as a backup.
openvpn – How to force all traffic through VPN?
How to force all traffic through OpenVPN
Add the following directive to the server configuration file:
push “redirect-gateway def1”
If your VPN setup is over a wireless network, where all clients and the server are on the same wireless subnet, add the local flag:
push “redirect-gateway local def1”
Pushing the redirect-gateway option to clients will cause all IP network traffic originating on client machines to pass through the OpenVPN server. The server will need to be configured to deal with this traffic somehow, such as by NATing it to the internet, or routing it through the server site’s HTTP proxy.
If you want to configure this on the client side, put
redirect-gateway def1in your client.ovpn file.
Guide for Allowing Users to Install Programs without Admin Password in Windows 10
How to Allow Users to Install Software without Admin Rights in Windows 10
An admin account on a Windows PC enjoys more privileges than any other account types. This account can install apps and make modifications to the system easily without too many steps. However, sometimes you may want to enable allow users to install software without admin rights in Windows 10. It’s totally cool and possible for you. The following guide will demonstrate multiple ways to do that.
Method 1: Change Your Standard Account to Admin Account to Install Programs
One of the ways to be able to install program without admin rights in Windows 10 is to convert your standard user account to an administrator account on your PC. You can ask your administrator to do this for you by following the following steps:
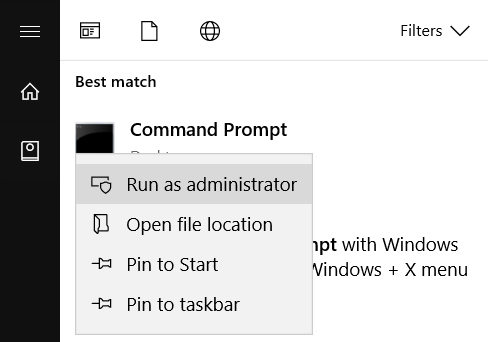
Open the Start Menu, search for Command Prompt, right-click on it and select Run as administrator.
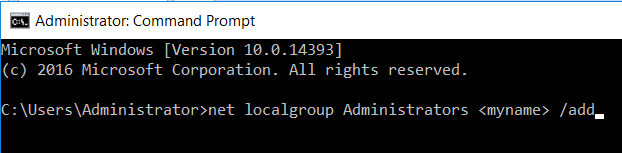
When the command prompt window opens, type in the following command and hit enter. Make sure to replace myname with the username of the account you’re converting to an admin account.
net localgroup Administrators <myname> /add
The account should instantly be converted to an admin account and you should then be able to install programs on your Windows 10 machine.
Source: Guide for Allowing Users to Install Programs without Admin Password in Windows 10
The Arcade Flyer Archive – Home
Source: The Arcade Flyer Archive – Home
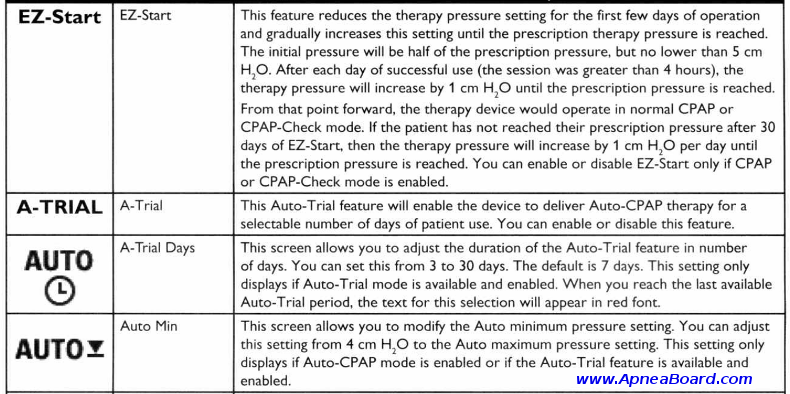
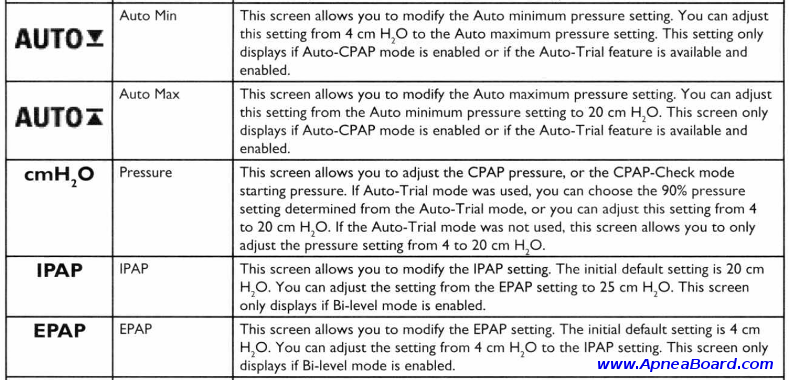
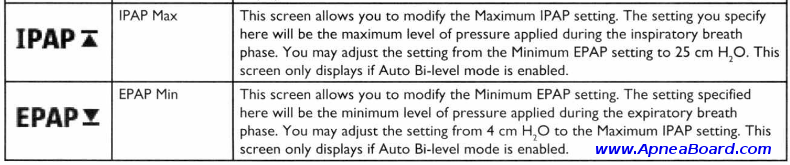
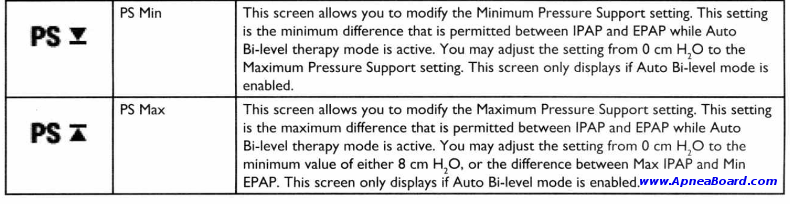
DreamStation Clinician Setup Instructions
Instructions for entering the CPAP Setup / Clinician Menu of the
Philips-Respironics DreamStation Series CPAP Machines
(should work for all DreamStation machines, including the DreamStation Auto BiPAP, DreamStation BiPAP Pro, DreamStation Auto CPAP, DreamStation CPAP Pro, & DreamStation CPAP machines)
To get the detailed Clinician Setup Guide for your CPAP Machine CLICK HERE
For instructions on how to set the optimum pressure on your CPAP Machine, CLICK HERE
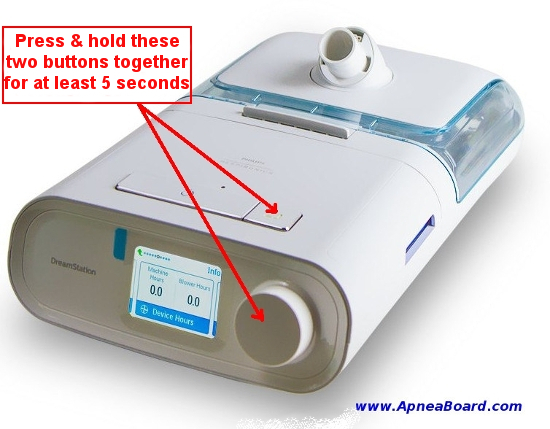
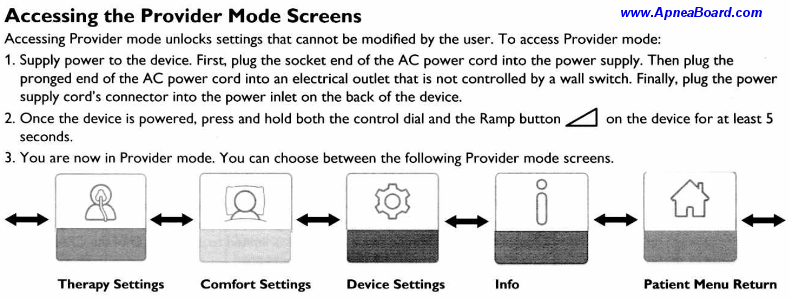
~ Entering the Clinician Setup Mode ~
(You must first plug in and power up your machine)
For more details, you may request the detailed Clinician Setup Guide for your DreamStation Machine HEREFor more information, or if you have questions regarding your Philips-Respironics DreamStation machine, please join the Apnea Board Forum and post your question there. We’d love to help you!