PowerShell CLI syntax coloring, auto-completion and much more: aka PSReadline – Cloud OS
AutoIt Scripting Language – AutoIt
AutoIt is a freeware BASIC-like scripting language designed for automating the Windows GUI and general purpose scripting.
Command Line Options – Mozilla | MDN
Command line options are used to specify various startup options for Mozilla applications. For example, you can use command line configuration options to bypass the Profile Manager and open a specific profile (if you have multiple profiles). You can also control how Mozilla applications open, which components open initially, and what the components do when they open. This page describes the commonly used options and how to use them. You can open the Command Line Interface by pressing Shift + F2.
Windows 10 Guide: Essential Keyboard Shortcuts
In that scenario, knowing how to switch between Virtual Desktops quickly and efficiently is key. Thus: These keyboard shortcuts!
| THE SHORTCUT | WHAT IT DOES… |
| Windows Key+Ctrl+D | Creates a new virtual desktop and switches to it. |
| Windows Key+Tab | Opens the Task View to display all Virtual Desktops. Each one will have a number, e.g., Desktop 1, Desktop 2. You then use the Virtual Desktop switcher at the bottom of the screen to click or tap on one of your desktops to switch to it. |
| Windows Key+Ctrl+Left Arrow | Switches to the virtual desktop on the left. |
| Windows Key+Ctrl+Right Arrow | Switches to the virtual desktop on the right. |
| Windows Key+Ctrl+F4 | Closes the current virtual desktop. |
Shortcuts: Microsoft Edge
Edge is Microsoft’s new browser for Windows 10, designed as an alternative to the aging Internet Explorer. Set up as the default browser in Windows 10, Edge takes a more minimalist approach to Web browsing, jettisoning some of the menus and toolbars that clutter IE, leaving more real estate for viewing the actual Web page.
Like Internet Explorer, Edge comes complete with a long list of keyboard shortcuts that you can use to run its various features and navigate the Web.
| THE SHORTCUT | WHAT IT DOES… |
| Ctrl+D | Adds current site to Favorites or Reading list. |
| Ctrl+I | Opens Favorites pane. |
| Ctrl+J | Opens Downloads pane. |
| Ctrl+H | Opens History pane. |
| Ctrl+P | Prints the current page. |
| Ctrl+F | Finds specific text on your current page. |
| Ctrl+Shift+R | Enters reading view, which displays a Web page in a more user-friendly format for reading. (Pressing Ctrl+Shift+R again takes Edge out of reading view.) |
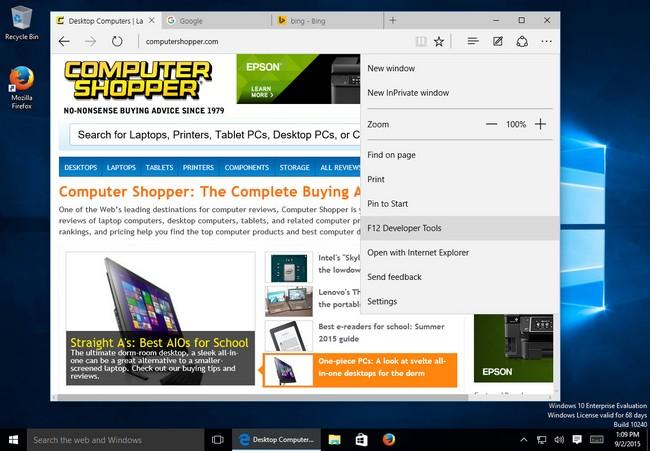
| F12 | Opens Edge’s Developer Tools to display a page’s HTML and scripting code. |
| F7 | Turns “caret browsing” on for the current tab. This displays a cursor on Web pages that you can use to select text with the keyboard. |
| Ctrl+Shift+Delete | Opens clear browsing data pane, so you can delete your browsing history, cookies, download history, and other data. |
| Ctrl+T | Opens a new tab. |
| Ctrl+Shift+T | Reopens the last closed tab. |
| Ctrl+F4 | Closes the current tab. |
| Ctrl+K | Duplicates your current Web page in a new tab. |
| Ctrl+N | Opens a new window. |
| Ctrl+Shift+P | Opens a new InPrivate Browsing window. |
| Ctrl+Tab | Switches to the next tab. |
| Ctrl+Shift+Tab | Switches to the previous tab. |
| Ctrl+1, 2, 3, etc. | Switches to a specific tab number. |
| Ctrl+9 | Switches to the last tab. |
| Ctrl+Plus Key (+) | Zooms in 25%. |
| Ctrl+Minus Key (-) | Zooms out 25%. |
| Ctrl+0 | Resets zoom level back to normal view. |
| Backspace (or Alt+Left Arrow) | Goes back to the previous page. |
| Alt+Right Arrow | Goes forward to the previous page. |
| F5 (or Ctrl+R) | Refreshes the current page. |
| Esc | Stops the Edge browser from trying to load the page. |
| F4 (or Alt+D) | Selects the URL in the address bar. |
| Ctrl+Enter | Auto-adds “www.” to the beginning and “.com” to the end of text typed in the address bar. |
| Ctrl+Click | Opens the current link in a new tab. |
| Ctrl+Shift+Click | Opens the current link in a new tab and switches to the tab. |
| Alt+Shift+Click | Opens the current link in a new window. |
Shortcuts: Windows 10’s Command Prompt
You’d never think it given how slick Windows 10 looks, but the command prompt is alive and well in 10. As in previous versions of Windows, you open a command prompt window in Windows 10 so that you can type a system-level command. Though the command prompt isn’t as popular as it was eons ago, it still comes in handy if you need to run certain techier commands that aren’t directly accessible through Windows.
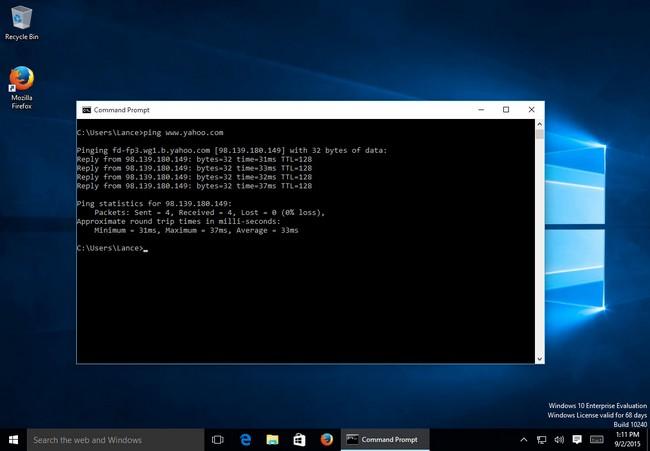
For example, running the command ipconfig at a command prompt displays your current Internet address, the address of your router, and more. Running the command ping followed by a Web site, such as ping www.yahoo.com, tells you how long it takes for you to get to Yahoo, useful if you’re having trouble reaching the site.
Copying and pasting commands into a command prompt used to be a hassle, but no more. With Windows 10, you can now use the standard Ctrl+C and Ctrl+V shortcuts to copy and paste text back and forth.
To open a command prompt, simply right-click on the Start button and choose Command Prompt from the popup menu. Here’s a set of keyboard shortcuts you can now use with it.
| THE SHORTCUT | WHAT IT DOES… |
| Ctrl+Shift+Home | Moves the cursor to the beginning of the command prompt’s text output, selecting all text between the cursor and the beginning. |
| Ctrl+Shift+End | Moves the cursor to the end of the command prompt’s text output, selecting all text between the cursor and the end. |
| Ctrl+Up | Moves one line up in the command prompt’s history. |
| Ctrl+Down | Moves one line down in the command prompt’s history. |
| Ctrl+M | Enter “mark mode,” which allows you to select text. |
| Ctrl+F | Opens a Find dialog to search for specific text in the command prompt’s output. |
| Ctrl+C | Copy the selected line of text. |
| Ctrl+X | Cut the selected line of text. |
| Ctrl+V | Paste the selected line of text. |
| Alt+F4 | Close the Command Prompt window. |
Shortcuts: Snapping Windows in Windows 10
The ability to “snap” windows already existed in Windows 7 and 8.1, but it’s such a handy feature that we wanted to highlight it in its own section. You can snap your current window to a specific area of the screen, such as the left side or right side, taking up half the available screen space.
This is helpful if you have more than one window open and you want to snap one to the right and the other to the left, with both occupying an equal amount of space on your display without tedious resizing.
| THE SHORTCUT | WHAT IT DOES… |
| Windows Key+Left Arrow | Snaps the current window to the left side of the screen, or to its previous position if already snapped right. |
| Windows Key+Right Arrow | Snaps the current window to the right side of the screen, or to its previous position if already snapped left. |
| Windows Key+Up Arrow | Maximizes or snaps the current window to the top of the screen. |
| Windows Key+Down Arrow | Minimizes or snaps the current window to the bottom of the screen. |
You can cycle through the different positions of a window using these shortcuts. For example, continually pressing Windows Key+Left Arrow snaps your current window from the right side to a restored position to the left side, while pressing Windows Key+Right Arrow snaps your current window from the left side to a restored position to the right side.
Assorted Shortcuts in Windows 10
The following shortcuts work across Windows 10 as a whole, or with specific features, such as Cortana and File Explorer. So consider these a miscellaneous collection of helpful shortcuts.
The old reliable Alt+Tab cycles through open windows.
| THE SHORTCUT | WHAT IT DOES |
| Windows Key | Opens the Start menu or Start screen. |
| Alt+Tab | Switches from one open window to another. Press the Tab key again to flip between windows, and release the key to select a window. |
| Windows Key+L | Locks your PC, or switches accounts. |
| Windows Key+D | Hides or minimizes all open windows on the desktop. |
| Windows Key+A | Opens or closes the Windows 10 Action Center. |
| Windows Key+S | Opens the search tool. |
| Windows Key+C | Opens Cortana in listening mode. |
| Windows Key+E | Opens a File Explorer window. |
| Windows Key+H | Opens the Share screen. |
| Windows Key+I | Opens the Settings screen |
| Windows Key+R | Opens the Run command. |
| Windows Key+X | Opens the Start button’s Quick Link menu. |
| Windows Key+K | Opens the Connect menu to search for wireless devices. |
| Windows Key+M | Minimizes all open windows. |
| Windows Key+P | Opens the presentation menu to switch the display to another device, such as a projector. |
| Windows Key+T | Cycles through apps on the Taskbar. |
| Windows Key+, (comma) | Peeks at the desktop. |
General Windows Keyboard Shortcuts: Oldies but Goodies
Some keyboard shortcuts have been around Windows for a long time, and Windows 10 carries on with their grand tradition. Many of these help you navigate or select text, so you’ll find most of these to be handy in a text-based application or word processor, such as Notepad, WordPad, or Microsoft Word. But they’re universal, so they should work in any Windows application.
| THE SHORTCUT | WHAT IT DOES |
| Ctrl+A | Selects all text. |
| Ctrl+C | Copies selected text. |
| Ctrl+X | Cuts selected text. |
| Ctrl+V | Pastes selected text at the cursor. |
| Shift+Left | Selects the character to the left of the cursor. (Pressing Shift+Left continually adds the previous character on the line to the selection.) |
| Shift+Right | Selects the character to the right of the cursor. (Pressing Shift+Right continually adds the next character on the line to the selection.) |
| Shift+Up | Selects the entire line above the cursor. (Pressing Shift+Up continually adds the next line above to the selection.) |
| Shift+Down | Selects the entire line below the cursor. (Pressing Shift+Up continually adds the next line below to the selection.) |
| Ctrl+Shift+Left | Selects the entire word to the left. (Pressing Ctrl+Shift+Left continually selects the prior word to the selection.) |
| Ctrl+Shift+Right | Selects the entire word to the right. (Pressing Ctrl+Shift+right continually selects the next word to the selection.) |
| Shift+Home | Selects the entire line to the left of the cursor. |
| Shift+End | Selects the entire line to the right of the cursor. |
| Shift+Page Up | Selects all text on the current screen above the cursor. |
| Shift+Page Down | Selects all text on the current screen below the cursor. |
| Ctrl+Home | Moves to the beginning of your document or file. |
| Ctrl+End | Moves to the end of your document or file. |
| Ctrl+S | Saves changes to your document or file. |
| Ctrl+Z | Undoes your last action. |
| Ctrl+Y | Redoes your last action. |
| Alt+F4 | Closes your current window or application. |
Source: Windows 10 Guide: Essential Keyboard Shortcuts | PCMag.com
72 Shortcuts for Windows 10 File Explorer (Windows)
Microsoft changes how Windows 10 disconnects USB storage devices | ZDNet
How to secure PowerShell Remoting in a Windows Domain
HOW TO SECURE POWERSHELL REMOTING IN A WINDOWS DOMAIN
Source: How to secure PowerShell Remoting in a Windows Domain
Set-LocalUser
Set-Local
User Modifies a local user account.Syntax
Set-LocalUser
   [-AccountExpires <DateTime>]
   [-AccountNeverExpires]
   [-Description <String>]
   [-FullName <String>]
   [-Name] <String>
   [-Password <SecureString>]
   [-PasswordNeverExpires <Boolean>]
   [-UserMayChangePassword <Boolean>]
   [-WhatIf]
   [-Confirm]
   [<CommonParameters>]
Set-LocalUser [-AccountExpires <DateTime>] [-AccountNeverExpires] [-Description <String>] [-FullName <String>] [-InputObject] <LocalUser> [-Password <SecureString>] [-PasswordNeverExpires <Boolean>] [-UserMayChangePassword <Boolean>] [-WhatIf] [-Confirm] [<CommonParameters>]Set-LocalUser [-AccountExpires <DateTime>] [-AccountNeverExpires] [-Description <String>] [-FullName <String>] [-Password <SecureString>] [-PasswordNeverExpires <Boolean>] [-SID] <SecurityIdentifier> [-UserMayChangePassword <Boolean>] [-WhatIf] [-Confirm] [<CommonParameters>]Description
The Set-LocalUser cmdlet modifies a local user account. This cmdlet can reset the password of a local user account.
Examples
Example 1: Change a description of a user account
PS C:\> Set-LocalUser -Name "Admin07" -Description "Description of this account."This command changes the description of a user account named Admin07.
Example 2: Change the password on an account
PS C:\> $Password = Read-Host -AsSecureString
PS C:\> $UserAccount = Get-LocalUser -Name "User02"
PS C:\> $UserAccount | Set-LocalUser -Password $Password
The first command prompts you for a password by using the Read-Host cmdlet. The command stores the password as a secure string in the $Password variable.
The second command gets a user account named User02 by using Get-LocalUser. The command stores the account in the $UserAccount variable.
The third command sets the new password on the user account stored in $UserAccount.
Parameters
-AccountExpiresSpecifies when the user account expires. To obtain a DateTime object, use the Get-Date cmdlet.
If you do not want the account to expire, specify the AccountNeverExpires parameter.
Type: DateTime Position: Named Default value: None Accept pipeline input: False Accept wildcard characters: False -AccountNeverExpiresIndicates that the account does not expire.
Type: SwitchParameter Position: Named Default value: None Accept pipeline input: False Accept wildcard characters: False -ConfirmPrompts you for confirmation before running the cmdlet.
Type: SwitchParameter Aliases: cf Position: Named Default value: False Accept pipeline input: False Accept wildcard characters: False -DescriptionSpecifies a comment for the user account. The maximum length is 48 characters.
Type: String Position: Named Default value: None Accept pipeline input: False Accept wildcard characters: False -FullNameSpecifies the full name for the user account. The full name differs from the user name of the user account.
Type: String Position: Named Default value: None Accept pipeline input: False Accept wildcard characters: False -InputObjectSpecifies the user account that this cmdlet changes. To obtain a user account, use the Get-LocalUser cmdlet.
Type: LocalUser Position: 0 Default value: None Accept pipeline input: True (ByPropertyName, ByValue) Accept wildcard characters: False -NameSpecifies the name of the user account that this cmdlet changes.
Type: String Position: 0 Default value: None Accept pipeline input: True (ByPropertyName, ByValue) Accept wildcard characters: False -PasswordSpecifies a password for the user account. If the user account is connected to a Microsoft account, do not set a password.
You can use
Read-Host -GetCredential, Get-Credential, or ConvertTo-SecureString to create a SecureString object for the password.If you omit the Password and NoPassword parameters, Set-LocalUser prompts you for the user’s password.
Type: SecureString Position: Named Default value: None Accept pipeline input: False Accept wildcard characters: False -PasswordNeverExpiresIndicates whether the password expires.
Type: Boolean Position: Named Default value: None Accept pipeline input: False Accept wildcard characters: False -SIDSpecifies the security ID (SID) of the user account that this cmdlet changes.
Type: SecurityIdentifier Position: 0 Default value: None Accept pipeline input: True (ByPropertyName, ByValue) Accept wildcard characters: False -UserMayChangePasswordIndicates that the user can change the password on the user account.
Type: Boolean Position: Named Default value: None Accept pipeline input: False Accept wildcard characters: False -WhatIfShows what would happen if the cmdlet runs. The cmdlet is not run.
Type: SwitchParameter Aliases: wi Position: Named Default value: False Accept pipeline input: False Accept wildcard characters: False Inputs
System.Management.Automation.SecurityAccountsManager.LocalUser, System.String, System.Security.Principal.SecurityIdentifier
You can pipe a local user, a string, or a SID to this cmdlet.
Outputs
None
This cmdlet does not generate any output.
Notes
- The PrincipalSource property is a property on LocalUser, LocalGroup, and LocalPrincipal objects that describes the source of the object. The possible sources are as follows:
- Local
- Active Directory
- Azure Active Directory group
- Microsoft Account
PrincipalSource is supported only by Windows 10, Windows Server 2016, and later versions of the Windows operating system. For earlier versions, the property is blank.
Related Links
Source: Set-LocalUser
Configuring WinRM over HTTPS to enable PowerShell remoting – TechNet UK Blog
Configuring WinRM over HTTPS to enable PowerShell remoting
PowerShell remoting allows machines to be remotely managed using PowerShell. PowerShell remoting is commonly used with virtual machines running on Azure. When we create a classic/service manager VM on Azure it is automatically configured with a WinRM endpoint so that we can connect using PowerShell remoting. However if we create a VM using Resource Manager WinRM over HTTPS is not configred by default. I had a query from a collegue regarding enabling WinRM over HTTPS so have documented the steps I provided to get them up and running.
The virtual machines I tested this with were running Windows Server 2012 R2, and the client OS was Windows 10. Both were clean installs with no prior configuration beyond the default configuration made by Azure.
Modify Network Security Group
WinRM over HTTPS uses port 5896. The first step is to enable traffic directed to this port to pass to the VM. This is done by adding a rule to the Network Security Group (NSG).
- Navigate to Virtual Machines | <your_vm> | Settings | Network Interfaces | <your_nic>
- Click on the NSG name:

- Go to Settings | Inbound Security Rules
- Add a rule called WinRM_HTTPS for TCP port 5986. You may choose to (and I would recommend) restricting the source address you your client’s public IP.

- The NSG should now look like this:

Create Firewall Rule inside the server OS
We must enable traffic over 5986 through Windows Firewall.
- Open Windows Firewall with Advanced Security

- Navigate to Inbound Rules | New Rule…
- In the Wizard select Port, TCP, 5986, Allow the connection, leave all network profiles selected, and name it WinRM HTTPS. The rule will look something like this:

-
Create Cert
To secure the connection a certificate needs to be created inside the server VM. You may choose to use a publically trusted certificate, but for our purposes we are using a self signed certificate as I just want to get up and running as quickly as possible. You need to provide a DNS name, later in the post we will sconnect via IP address and skip the DNS name check so it doesn’t actually mattter what you set this to. However best practice would be to ensure you have a DNS name resolving to your Azure VM’s public IP address and use that DNS name.
- Log onto the server using RDP.
- Open a PowerShell prompt as Administrator and execute the following:New-SelfSignedCertificate -DnsName<your_server_dns_name_or_whatever_you_like> -CertStoreLocation Cert:\LocalMachine\My
- Copy the certificate thumbprint returned by the command to the clipboard:

-
Configure WinRM to listen on 5986
By default WinRM over HTTP is configured to listed on 5985. We need to enable it on 5986 and bind the certificate.
- Open a command prompt window as Administrator (not PowerShell)
- Run the following command, pasting your new certificate’s thumbprint into the command (all on one line):
winrm create winrm/config/Listener?Address=*+Transport=HTTPS @{Hostname=”<your_server_dns_name_or_whatever_you_like>”; CertificateThumbprint=”<certificate_thumbprint_from powershell>”}
You should get the following returned:

Connect from the client PC
To connect from the client PC open a PowerShell prompt and execute the following, using your server IP address/DNS name and local admin username. Please note that as we are using a self signed certificate I have skipped the Certification Authority (CA) check and as I am using an IP address skipped the Common Name (CN) check. You will be prompted for the password.
$so = New-PsSessionOption –SkipCACheck -SkipCNCheckEnter-PSSession -ComputerName <ip_address_or_dns_name_of_server> -Credential <local_admin_username> -UseSSL -SessionOption $soYou should now get a prompt as follows:

You can now execute commands on your remote server!


Source: Configuring WinRM over HTTPS to enable PowerShell remoting – TechNet UK Blog