Command line options are used to specify various startup options for Mozilla applications. For example, you can use command line configuration options to bypass the Profile Manager and open a specific profile (if you have multiple profiles). You can also control how Mozilla applications open, which components open initially, and what the components do when they open. This page describes the commonly used options and how to use them. You can open the Command Line Interface by pressing Shift + F2.
In that scenario, knowing how to switch between Virtual Desktops quickly and efficiently is key. Thus: These keyboard shortcuts!
THE SHORTCUT
WHAT IT DOES…
Windows Key+Ctrl+D
Creates a new virtual desktop and switches to it.
Windows Key+Tab
Opens the Task View to display all Virtual Desktops. Each one will have a number, e.g., Desktop 1, Desktop 2. You then use the Virtual Desktop switcher at the bottom of the screen to click or tap on one of your desktops to switch to it.
Windows Key+Ctrl+Left Arrow
Switches to the virtual desktop on the left.
Windows Key+Ctrl+Right Arrow
Switches to the virtual desktop on the right.
Windows Key+Ctrl+F4
Closes the current virtual desktop.
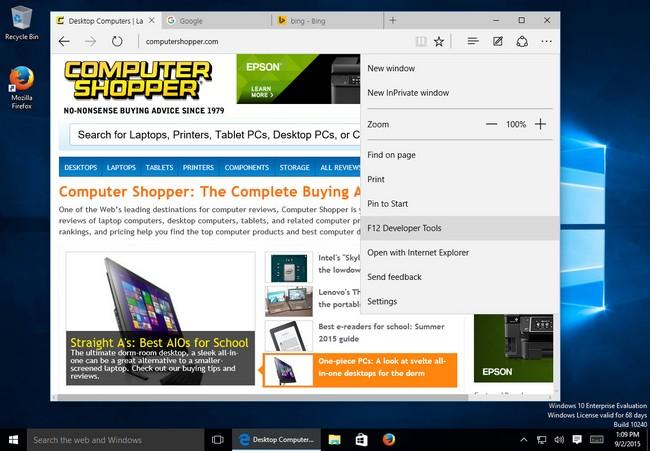
Shortcuts: Microsoft Edge
Edge is Microsoft’s new browser for Windows 10, designed as an alternative to the aging Internet Explorer. Set up as the default browser in Windows 10, Edge takes a more minimalist approach to Web browsing, jettisoning some of the menus and toolbars that clutter IE, leaving more real estate for viewing the actual Web page.
Like Internet Explorer, Edge comes complete with a long list of keyboard shortcuts that you can use to run its various features and navigate the Web.
THE SHORTCUT
WHAT IT DOES…
Ctrl+D
Adds current site to Favorites or Reading list.
Ctrl+I
Opens Favorites pane.
Ctrl+J
Opens Downloads pane.
Ctrl+H
Opens History pane.
Ctrl+P
Prints the current page.
Ctrl+F
Finds specific text on your current page.
Ctrl+Shift+R
Enters reading view, which displays a Web page in a more user-friendly format for reading. (Pressing Ctrl+Shift+R again takes Edge out of reading view.)
F12
Opens Edge’s Developer Tools to display a page’s HTML and scripting code.
F7
Turns “caret browsing” on for the current tab. This displays a cursor on Web pages that you can use to select text with the keyboard.
Ctrl+Shift+Delete
Opens clear browsing data pane, so you can delete your browsing history, cookies, download history, and other data.
Ctrl+T
Opens a new tab.
Ctrl+Shift+T
Reopens the last closed tab.
Ctrl+F4
Closes the current tab.
Ctrl+K
Duplicates your current Web page in a new tab.
Ctrl+N
Opens a new window.
Ctrl+Shift+P
Opens a new InPrivate Browsing window.
Ctrl+Tab
Switches to the next tab.
Ctrl+Shift+Tab
Switches to the previous tab.
Ctrl+1, 2, 3, etc.
Switches to a specific tab number.
Ctrl+9
Switches to the last tab.
Ctrl+Plus Key (+)
Zooms in 25%.
Ctrl+Minus Key (-)
Zooms out 25%.
Ctrl+0
Resets zoom level back to normal view.
Backspace (or Alt+Left Arrow)
Goes back to the previous page.
Alt+Right Arrow
Goes forward to the previous page.
F5 (or Ctrl+R)
Refreshes the current page.
Esc
Stops the Edge browser from trying to load the page.
F4 (or Alt+D)
Selects the URL in the address bar.
Ctrl+Enter
Auto-adds “www.” to the beginning and “.com” to the end of text typed in the address bar.
Ctrl+Click
Opens the current link in a new tab.
Ctrl+Shift+Click
Opens the current link in a new tab and switches to the tab.
Alt+Shift+Click
Opens the current link in a new window.
Shortcuts: Windows 10’s Command Prompt
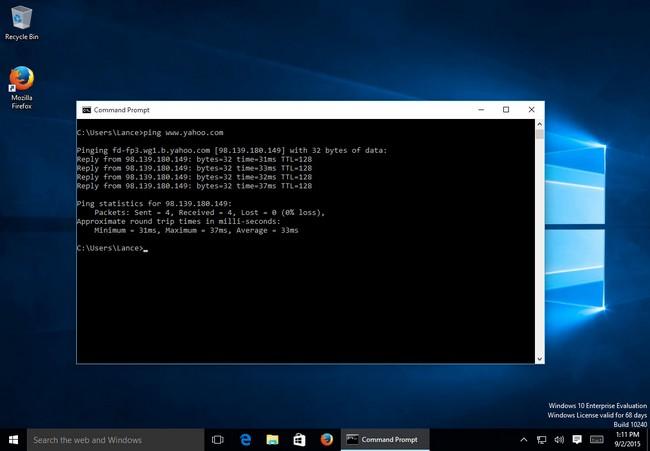
You’d never think it given how slick Windows 10 looks, but the command prompt is alive and well in 10. As in previous versions of Windows, you open a command prompt window in Windows 10 so that you can type a system-level command. Though the command prompt isn’t as popular as it was eons ago, it still comes in handy if you need to run certain techier commands that aren’t directly accessible through Windows.
For example, running the command ipconfig at a command prompt displays your current Internet address, the address of your router, and more. Running the command ping followed by a Web site, such as ping www.yahoo.com, tells you how long it takes for you to get to Yahoo, useful if you’re having trouble reaching the site.
Copying and pasting commands into a command prompt used to be a hassle, but no more. With Windows 10, you can now use the standard Ctrl+C and Ctrl+V shortcuts to copy and paste text back and forth.
To open a command prompt, simply right-click on the Start button and choose Command Prompt from the popup menu. Here’s a set of keyboard shortcuts you can now use with it.
THE SHORTCUT
WHAT IT DOES…
Ctrl+Shift+Home
Moves the cursor to the beginning of the command prompt’s text output, selecting all text between the cursor and the beginning.
Ctrl+Shift+End
Moves the cursor to the end of the command prompt’s text output, selecting all text between the cursor and the end.
Ctrl+Up
Moves one line up in the command prompt’s history.
Ctrl+Down
Moves one line down in the command prompt’s history.
Ctrl+M
Enter “mark mode,” which allows you to select text.
Ctrl+F
Opens a Find dialog to search for specific text in the command prompt’s output.
Ctrl+C
Copy the selected line of text.
Ctrl+X
Cut the selected line of text.
Ctrl+V
Paste the selected line of text.
Alt+F4
Close the Command Prompt window.
Shortcuts: Snapping Windows in Windows 10
The ability to “snap” windows already existed in Windows 7 and 8.1, but it’s such a handy feature that we wanted to highlight it in its own section. You can snap your current window to a specific area of the screen, such as the left side or right side, taking up half the available screen space.
This is helpful if you have more than one window open and you want to snap one to the right and the other to the left, with both occupying an equal amount of space on your display without tedious resizing.
THE SHORTCUT
WHAT IT DOES…
Windows Key+Left Arrow
Snaps the current window to the left side of the screen, or to its previous position if already snapped right.
Windows Key+Right Arrow
Snaps the current window to the right side of the screen, or to its previous position if already snapped left.
Windows Key+Up Arrow
Maximizes or snaps the current window to the top of the screen.
Windows Key+Down Arrow
Minimizes or snaps the current window to the bottom of the screen.
You can cycle through the different positions of a window using these shortcuts. For example, continually pressing Windows Key+Left Arrow snaps your current window from the right side to a restored position to the left side, while pressing Windows Key+Right Arrow snaps your current window from the left side to a restored position to the right side.
Assorted Shortcuts in Windows 10
The following shortcuts work across Windows 10 as a whole, or with specific features, such as Cortana and File Explorer. So consider these a miscellaneous collection of helpful shortcuts.
The old reliable Alt+Tab cycles through open windows.
THE SHORTCUT
WHAT IT DOES
Windows Key
Opens the Start menu or Start screen.
Alt+Tab
Switches from one open window to another. Press the Tab key again to flip between windows, and release the key to select a window.
Windows Key+L
Locks your PC, or switches accounts.
Windows Key+D
Hides or minimizes all open windows on the desktop.
Windows Key+A
Opens or closes the Windows 10 Action Center.
Windows Key+S
Opens the search tool.
Windows Key+C
Opens Cortana in listening mode.
Windows Key+E
Opens a File Explorer window.
Windows Key+H
Opens the Share screen.
Windows Key+I
Opens the Settings screen
Windows Key+R
Opens the Run command.
Windows Key+X
Opens the Start button’s Quick Link menu.
Windows Key+K
Opens the Connect menu to search for wireless devices.
Windows Key+M
Minimizes all open windows.
Windows Key+P
Opens the presentation menu to switch the display to another device, such as a projector.
Windows Key+T
Cycles through apps on the Taskbar.
Windows Key+, (comma)
Peeks at the desktop.
General Windows Keyboard Shortcuts: Oldies but Goodies
Some keyboard shortcuts have been around Windows for a long time, and Windows 10 carries on with their grand tradition. Many of these help you navigate or select text, so you’ll find most of these to be handy in a text-based application or word processor, such as Notepad, WordPad, or Microsoft Word. But they’re universal, so they should work in any Windows application.
The old reliable Alt+Tab cycles through open windows.
THE SHORTCUT
WHAT IT DOES
Ctrl+A
Selects all text.
Ctrl+C
Copies selected text.
Ctrl+X
Cuts selected text.
Ctrl+V
Pastes selected text at the cursor.
Shift+Left
Selects the character to the left of the cursor. (Pressing Shift+Left continually adds the previous character on the line to the selection.)
Shift+Right
Selects the character to the right of the cursor. (Pressing Shift+Right continually adds the next character on the line to the selection.)
Shift+Up
Selects the entire line above the cursor. (Pressing Shift+Up continually adds the next line above to the selection.)
Shift+Down
Selects the entire line below the cursor. (Pressing Shift+Up continually adds the next line below to the selection.)
Ctrl+Shift+Left
Selects the entire word to the left. (Pressing Ctrl+Shift+Left continually selects the prior word to the selection.)
Ctrl+Shift+Right
Selects the entire word to the right. (Pressing Ctrl+Shift+right continually selects the next word to the selection.)
Shift+Home
Selects the entire line to the left of the cursor.
Shift+End
Selects the entire line to the right of the cursor.
Shift+Page Up
Selects all text on the current screen above the cursor.
Shift+Page Down
Selects all text on the current screen below the cursor.
The first command prompts you for a password by using the Read-Host cmdlet. The command stores the password as a secure string in the $Password variable.
The second command gets a user account named User02 by using Get-LocalUser. The command stores the account in the $UserAccount variable.
The third command sets the new password on the user account stored in $UserAccount.
Parameters
-AccountExpires
Specifies when the user account expires. To obtain a DateTime object, use the Get-Date cmdlet.
If you do not want the account to expire, specify the AccountNeverExpires parameter.
Type:
DateTime
Position:
Named
Default value:
None
Accept pipeline input:
False
Accept wildcard characters:
False
-AccountNeverExpires
Indicates that the account does not expire.
Type:
SwitchParameter
Position:
Named
Default value:
None
Accept pipeline input:
False
Accept wildcard characters:
False
-Confirm
Prompts you for confirmation before running the cmdlet.
Type:
SwitchParameter
Aliases:
cf
Position:
Named
Default value:
False
Accept pipeline input:
False
Accept wildcard characters:
False
-Description
Specifies a comment for the user account. The maximum length is 48 characters.
Type:
String
Position:
Named
Default value:
None
Accept pipeline input:
False
Accept wildcard characters:
False
-FullName
Specifies the full name for the user account. The full name differs from the user name of the user account.
Type:
String
Position:
Named
Default value:
None
Accept pipeline input:
False
Accept wildcard characters:
False
-InputObject
Specifies the user account that this cmdlet changes. To obtain a user account, use the Get-LocalUser cmdlet.
Type:
LocalUser
Position:
0
Default value:
None
Accept pipeline input:
True (ByPropertyName, ByValue)
Accept wildcard characters:
False
-Name
Specifies the name of the user account that this cmdlet changes.
Type:
String
Position:
0
Default value:
None
Accept pipeline input:
True (ByPropertyName, ByValue)
Accept wildcard characters:
False
-Password
Specifies a password for the user account. If the user account is connected to a Microsoft account, do not set a password.
You can use Read-Host -GetCredential, Get-Credential, or ConvertTo-SecureString to create a SecureString object for the password.
If you omit the Password and NoPassword parameters, Set-LocalUser prompts you for the user’s password.
Type:
SecureString
Position:
Named
Default value:
None
Accept pipeline input:
False
Accept wildcard characters:
False
-PasswordNeverExpires
Indicates whether the password expires.
Type:
Boolean
Position:
Named
Default value:
None
Accept pipeline input:
False
Accept wildcard characters:
False
-SID
Specifies the security ID (SID) of the user account that this cmdlet changes.
Type:
SecurityIdentifier
Position:
0
Default value:
None
Accept pipeline input:
True (ByPropertyName, ByValue)
Accept wildcard characters:
False
-UserMayChangePassword
Indicates that the user can change the password on the user account.
Type:
Boolean
Position:
Named
Default value:
None
Accept pipeline input:
False
Accept wildcard characters:
False
-WhatIf
Shows what would happen if the cmdlet runs. The cmdlet is not run.
You can pipe a local user, a string, or a SID to this cmdlet.
Outputs
None
This cmdlet does not generate any output.
Notes
The PrincipalSource property is a property on LocalUser, LocalGroup, and LocalPrincipal objects that describes the source of the object. The possible sources are as follows:
Local
Active Directory
Azure Active Directory group
Microsoft Account
PrincipalSource is supported only by Windows 10, Windows Server 2016, and later versions of the Windows operating system. For earlier versions, the property is blank.
I discovered that some of my task scheduler tasks are failing on the server and wanted to configure email notifications if that happens
I found an article how to send task scheduler notifications
I wanted to configure a trigger for multiple Event IDs and found how to do this here
The only question left if the list of Event IDs and I could not find a list of all possible values so I extracted them from EventLog myself and putting them here
Event ID
Task Category
100
Task Started
101
Task Start Failed
102
Task completed
103
Action start failed
106
Task registered
107
Task triggered on scheduler
108
Task triggered on event
110
Task triggered by user
111
Task terminated
118
Task triggered by computer startup
119
Task triggered on logon
129
Created Task Process
135
Launch condition not met, machine not idle
140
Task registration updated
141
Task registration deleted
142
Task disabled
200
Action started
201
Action completed
203
Action failed to start
301
Task engine properly shut down
310
Task Engine started
311
Task Engine failed to start
314
Task Engine idle
317
Task Engine started
318
Task engine properly shut down
319
Task Engine received message to start task
322
Launch request ignored, instance already running
329
Task stopping due to timeout reached
332
Launch condition not met, user not logged-on
400
Service started
411
Service signaled time change
700
Compatibility module started
Going to create an alert for ids 101,103,111,311,329
m from EventLog myself and putting them here Event
ScheduledTasks This reference provides cmdlet descriptions and syntax for all Scheduled Tasks cmdlets. It lists the cmdlets in alphabetical order based on the verb at the beginning of the cmdlet.