How to Hide or Show User Accounts from Login Screen on Windows
By default, the Windows login screen displays the account of the last user who logged on to this computer and a list of all local users. Windows allows you to hide or show the last signed-in user name, or even list all local or active domain users on the computer sign-in screen.
Contents:
Hide Last Signed-in Username from Windows Login Screen
Users find it convenient to see the last logged account name on the Windows Logon Screen without having to type it in manually each time. For security reasons, you can prevent the last username from being displayed on the Windows logon screen on public computers (or other insecure locations) by using GPO:
- Open the domain (
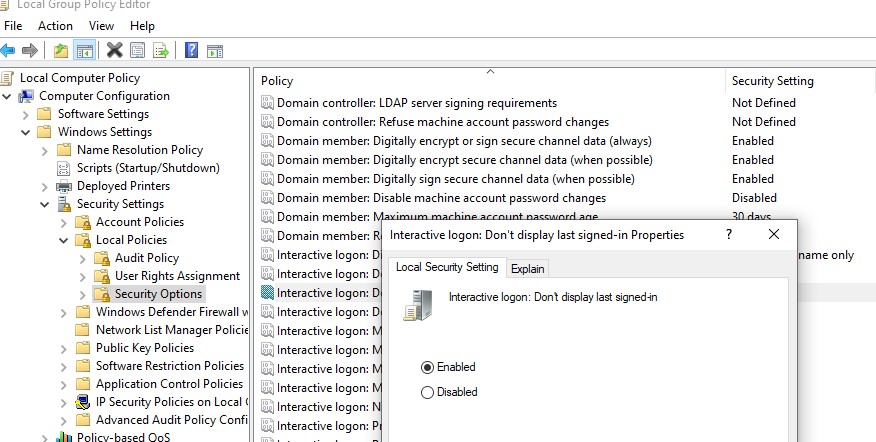
gpmc.msc) or local Group Policy editor (gpedit.msc) and go Computer Configuration -> Windows Settings -> Security Settings -> Local Policies -> Security Options;- Enable the policy Interactive logon: Don’t display last signed-in. This policy is disabled by default;
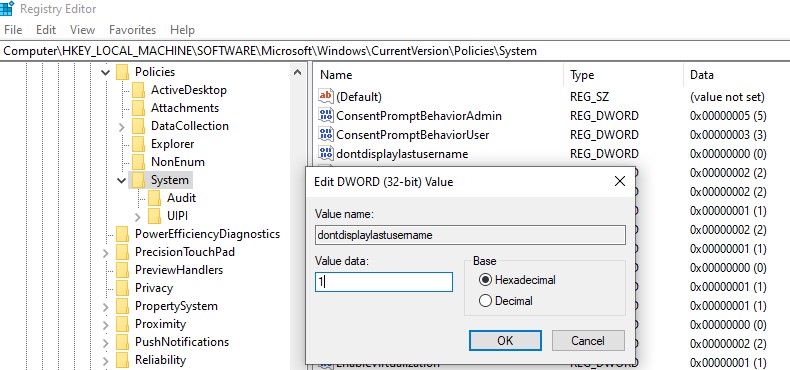
 You can hide the last logged username from the sign-in screen by changing the registry parameter. Go to reg key HKLM\SOFTWARE\Microsoft\Windows\CurrentVersion\Policies\System, create a new DWORD parameter named dontdisplaylastusername with the value 1.
- To hide the logged-in username on the lock screen (when the computer is locked by pressing
Win+Lor through the lock screen GPO), enable the Group Policy option “Interactive logon: Display user information when the session is locked” and set the value “Do not display user information”.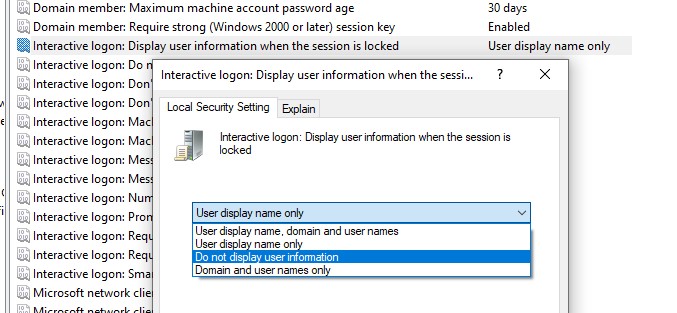 The registry parameter DontDisplayLockedUserId in the same registry key with a value of 3 matches this policy setting.
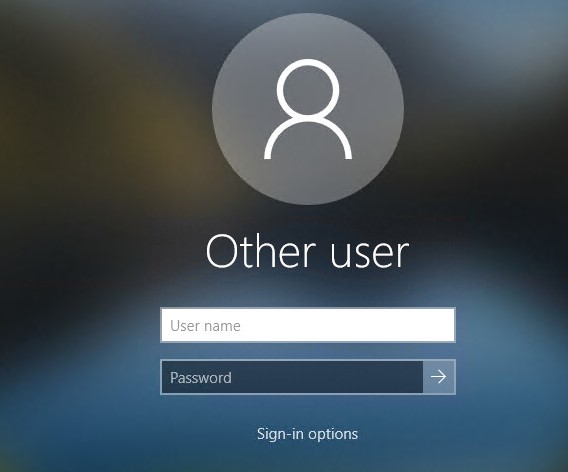
Blank username and password fields now appear on the Windows logon and lock screens instead of the previously signed-in username.
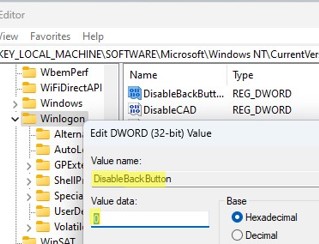
You can hide the list of users from the Windows lock screen by using the DisableBackButton registry parameter:
reg add "HKLM\SOFTWARE\Microsoft\Windows NT\CurrentVersion\Winlogon" /t REG_DWORD /f /d 0 /v DisableBackButtonTo unlock the computer, the user must enter their password. To view a list of local user accounts, the user must first press the Switch User button on the lock screen.
Show All Local Users on the Windows Sign-in Screen
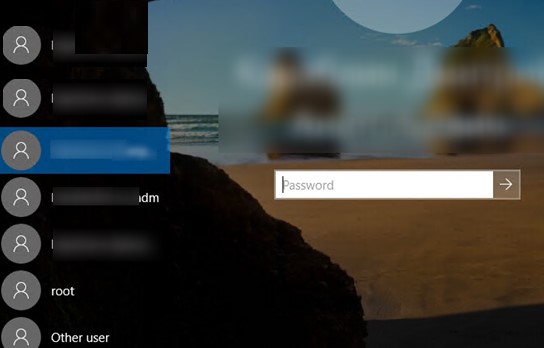
By default, modern Windows builds (tested on Windows 11 23H2 and Windows 10 22H2) always show a list of enabled local users in the bottom left corner of the login screen. This only works on computers that are not joined to the Active Directory domain. Hidden (see below) and disabled user accounts are not displayed on the sign-in screen.
To log on to the computer, the user simply clicks on the required user account and enters its password.
If there is no password set for the user account (blank password), simply select a user and click the Sign-In button to automatically log on to Windows without a password.If the list of local users is not displayed on the Windows logon screen, check the following settings in the Local GPO editor (
gpedit.msc):
- Interactive Logon: Do not display last signed-in =
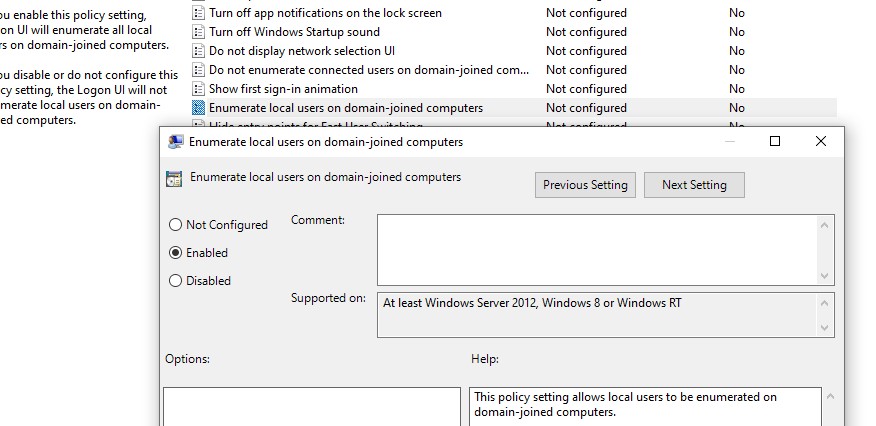
Disabled(Computer Configuration -> Windows Settings -> Security Settings -> Local Policies -> Security Options);- Enumerate local users on domain-joined computers =
Enabled(Computer Configuration -> Administrative Templates -> System -> Logon).
Restart your computer to apply the new Group Policy settings.
Show Logged In Domain Users on Windows Logon Screen
If more than one user is using the same computer, you can see a list of users with active sessions on the Windows sign-in screen. An active session means that the user is logged on to the computer. This can be a shared computer (used in user switching mode), a kiosk, Windows Server hosts running the RDS role, or Windows 11/10 devices that allow multiple RDP connections).
Check that the following policies are disabled in Computer Configuration -> Windows Settings -> Security Settings -> Local Policies -> Security Options:
- Interactive logon: Don’t display last signed-in: Disabled
- Interactive logon: Don’t display username at sign-in: Disabled
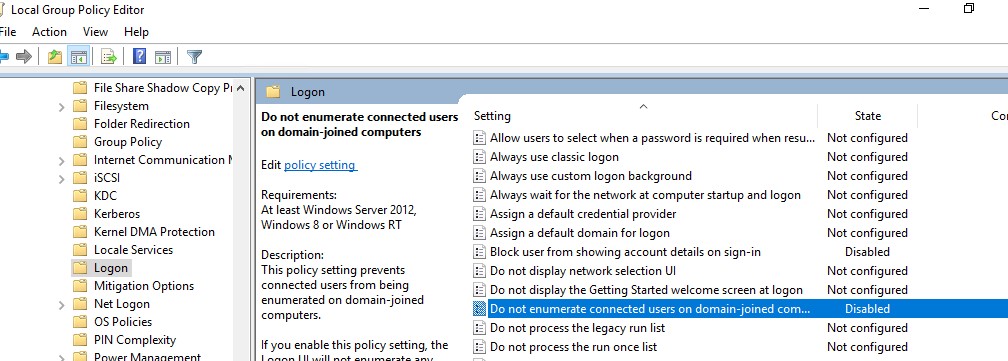
Then disable the GPO options in Computer Configuration -> Administrative Templates -> System -> Logon:
- Block user from showing account details on sign-in: Disabled
- Do not enumerate connected users on domain-joined computer: Disabled
On a domain-joined computer, you can check the resulting settings of these GPO options using thersop.mscor gpresult.A list of logged-in users will then appear on the Windows Welcome Screen. Both active and disconnected user sessions (for example, due to RDP timeout) are displayed.
You can display Active Directory user profile photos on the Windows logon screen instead of the default user icons.Hide Specific User Accounts from the Windows Sign-in Screen
The Windows Welcome screen always displays users who are members of one of the following local groups: Administrators, Users, Power Users, and Guests (except the disabled user accounts).
You can hide specific users from the list on the Windows login screen through the registry. For each user you want to hide, create a DWORD parameter under the reg key
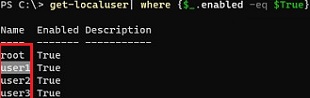
HKLM\SOFTWARE\Microsoft\Windows NT\CurrentVersion\Winlogon\SpecialAccounts\UserListwith the username and value 0.List all local user account names using PowerShell or cmd:
Get-LocalUser | where {$_.enabled –eq $true}Or:
Net user
To hide a specific user account (for example, user123) from the Windows sign-in screen, run the command:
reg add "HKLM\SOFTWARE\Microsoft\Windows NT\CurrentVersion\Winlogon\SpecialAccounts\UserList" /t REG_DWORD /f /d 0 /v User123
If you want to show the hidden user on the login screen, remove this registry entry or change its value to 1.If the built-in Windows Administrator account is enabled, and it is not the only account with local administrator permissions on the computer (!!!), you can also hide it:
reg add "HKLM\SOFTWARE\Microsoft\Windows NT\CurrentVersion\Winlogon\SpecialAccounts\UserList" /t REG_DWORD /f /d 0 /v administratorTo hide all users except the last logged-on user, set the following GPO settings in Computer Configuration -> Administrative Templates -> System -> Logon:
- Enumerate local users on domain-joined computers = Disabled
- Do not enumerate connected users on domain-joined computer = Enabled


Source: How to Hide or Show User Accounts from Login Screen on Windows | Windows OS Hub