List and change BIOS settings with PowerShell – Syst & Deploy

In this post I will show you how to list and change BIOS settings for HP, Dell and Lenovo with PowerShell only.In my previous posts, I did some tools and module to list, export and change BIOS settings for local and remote computers and many manufacturers.I will now show you how to manage BIOS settings with PowerShell only:- List settings- Change settings without BIOS password – Change settings with BIOS password configured – Change settings from a CSV file that contains settings to changeI say only, because there are some tools available to manage BIOS with PowerShell. For instance for HP, there is a utility called BCU.As I don’t want any other tools to manage BIOS I just used PowerShell.

Source: List and change BIOS settings with PowerShell – Syst & Deploy

List and change BIOS settings with PowerShell

In this post I will show you how to list and change BIOS settings for HP, Dell and Lenovo with PowerShell only.In my previous posts, I did some tools and module to list, export and change BIOS settings for local and remote computers and many manufacturers.I will now show you how to manage BIOS settings with PowerShell only:- List settings- Change settings without BIOS password – Change settings with BIOS password configured – Change settings from a CSV file that contains settings to changeI say only, because there are some tools available to manage BIOS with PowerShell. For instance for HP, there is a utility called BCU.As I don’t want any other tools to manage BIOS I just used PowerShell.

Source: List and change BIOS settings with PowerShell – Syst & Deploy

Fix: “something went wrong” while creating account on Windows 10

Create a new user account through the Command Prompt

While creating a new user account through the Command Prompt will not actually solve the “Something went wrong” error when creating a new user account, it will, however, allow the user to successfully create a new user account which, unlike their old one, will not suffer from the “Something went wrong” issue.

Open the Start Menu. Type cmd into the Search bar, right click on the program named Command Prompt that appears and select Run as administrator.

something went wrong-4

Type in the command net user (desired account name) (desired account password) /add.

something went wrong-5

Press the Enter. Next, to turn the newly created account into an Administrator, type in the command net localgroup administrators (name of newly created account) /add.

something went wrong-6

Press the Enter. As soon as the last command is executed, a new Administrator account will have been created on your Windows 10 computer, and this user account will not be affected by the “Something went wrong” issue that the account you were previously using was.

User Suggested Method

This method is suggested by Ahmad Barakat in the comments section. The reason for him was that there was another account setup as a Microsoft account, this account was created automatically after upgrading to Windows 10!! and prevented him from signing in with his user profile. So he did this -> “Go to the user accounts> Manage other accounts> find that account and delete it”

Source: Fix: “something went wrong” while creating account on Windows 10 – Appuals.com

How to secure PowerShell Remoting in a Windows Domain

Out of the box, PowerShell remoting is very secure but there are enhancements you can make to increase security.

Source: How to secure PowerShell Remoting in a Windows Domain


PowerShell is an awesomely powerful tool for configuring, managing and controlling your environment. Out of the box, PowerShell remoting is very secure but there are enhancements you can make to increase security.

I was recently asked to come up with a security posture for my organization and to communicate that stance to my leaders. I knew PS was secure from the start but I couldn’t rely on what I thought, so I needed to dive in and do some research to confirm my opinion of security in PowerShell with respect to remoting.

This is a reference guide I originally built for myself that I thought would be useful for others when trying to figure out how to secure PowerShell remoting or at least answer the questions someone may be asked from management or security teams in a corporate environment. I have pulled relevant data from a number of sources including, but not limited to:

One big caveat before I begin: There are different settings that can be put in place for domain-based machines and workgroup based machines. I am largely ignoring the workgroup scenarios because I do not have to worry about that consideration. I’ll make a few references to configs for workgroup computers, but this guide is targeted at securing connections in an Active Directory domain running mostly Windows computers. Also of note, I am not going to talk at all about PS remoting to Linux because, again, not a big requirement for me or my org. Please visit the links above and see the security considerations for those two scenarios.

Lets’ get started!

Security & Authentication

PowerShell was designed from the start with security in mind. The default method of authentication out of the box is Kerberos. Connections between the two computers in a domain will use Kerberos for initial authentication and fall back to NTLM for workgroup computers. You can change these default settings and actually lower the authentication settings, but I would not recommend that.

Once the authentication phase has completed, all session communications are encrypted using a symmetric 256-bit key, even with HTTP as the protocol. Domain-joined computers never pass credentials in the clear; this is the default setting.

Remote connections between domain-joined computers can be made with a number of different methods. The three most common methods when using PowerShell are:

  • Connect via WMI
  • Connect via CIM
  • Connect via PS remoting/WinRM

The main difference between these remote connection methods is what protocol is used to make the remote connection. Connections via WMI use DCOM to access remote machines. Connections via CIM or WinRM use the WSMan protocol.

  • WMI is the Microsoft implementation of Web-Based Enterprise Management and provides users with information about the status of local or remote computer systems. The main knock against WMI is that it isn’t very firewall friendly. For the connection to succeed, the remote computer must permit incoming network traffic on TCP ports 135, 445, and additional dynamically-assigned ports, typically in the range of 1024 to 1034.
  • WS-Management protocol, a SOAP-based, firewall-friendly protocol, was designed for systems to locate and exchange management information. The intent of the WS-Management protocol specification is to provide interoperability and consistency for enterprise systems that have computers running on a variety of operating systems from different vendors. It only requires TWO ports (one for http, one for https) to be open and has much greater security posture than WMI.

By default, PowerShell Remoting relies on WinRM to make connections to other machines unless a WMI call is being made. WinRM (and WMI) only allow connections from members of the Administrators group. If you have a handle on who has admin access to your servers and desktops, then you’re off to a great start in securing your PS remoting environment. PS remote sessions are launched under the user’s context, so all operating system access controls applied to individual users and groups continue to apply to them while connected over PowerShell remoting.

Certificate-Based Authentication

When you authenticate with Kerberos to a remote PC, you are verifying that you are who you say you are. However, neither you or the remote node can verify if the either computer is who they say they are. Certificate-Based Authentication solves this problem through the use of certificates and the SSL authentication protocol. Using SSL certificates, the authenticity of the remote computer can be proven as well as the the machine initiating the connection. Without SSL, a computer can spoof a name and trick the other side into thinking they are connected to a different computer by falsely building confidence that the spoofed computer is one they can trust. This scenario I have described is simple example of how the first half of a man-in-the-middle attack is crafted.

In order for you to enable Certificate-Based Authentication, you must have a certificate infrastructure in place and each server must have a certificate issued by the the Certificate Authority. You could also build the infrastructure if it doesn’t exist but this is not a trivial task. These requirements make Certificate-Based Authentication tough to put in place if you don’t already have that infrastructure setup beforehand and a deep understanding of how certificates work.

Firewall Settings

PowerShell Remoting (and WinRM) listen on the following ports:

  • HTTP: 5985
  • HTTPS: 5986

Earlier I mentioned that WMI is less firewall friendly because it connects via TCP ports 135, 445, and additional dynamically-assigned ports, typically in the range of 1024 to 1034. WinRM is much easier to secure since you can limit your firewall to only opening two ports. With SSL in place, you only need one port!

The default Windows Firewall rule for PowerShell remoting accepts all connections on private networks. On public networks, the default Windows Firewall rule allows PowerShell remoting connections only from within the same subnet. You have to explicitly change that rule to open PowerShell remoting to all connections on a public network.

WinRM runs as a service under the Network Service account and spawns isolated processes running as user accounts to host PowerShell instances. An instance of PowerShell running as one user has no access to a process running an instance of PowerShell as another user.

Up until now, we have been discussing authentication and firewall settings. Hopefully, it’s clear that there isn’t much that you need to do to improve your security for these two areas but now we’re going to start to discuss some areas where you do have some real options that can increase the security of your PowerShell remoting environment.

Limiting Connections

Out of the box, every Windows computer on your network can make a connection to any other computer on that network if the user connecting has the rights and there is a network path available between the two nodes. One very easy way to beef up the security of your organization is to limit which machines can start a remote connection. For example, let’s assume you are an admin of a computer network that has 500 computers. Of those 500 computers, let’s say you manage 20 servers and that you have an IT support staff of 10 people. You could argue that there are approximately 470 computers that will probably never INITIATE a remote PowerShell connection attempt (500 PC’s – 20 servers – 10 IT admins). If you shut off the ability to make remote PowerShell connections for those 470 computers, you just reduce your PowerShell attack surface by 94%!

The idea is that most of your end users would never need to initiate remote connections, so you can make yourself more secure by turning off the ability for them to do so. This would protect your org when a machine gets PWNED and the attacker attempts to run remote PS commands from that machine. It would also stop an attacker from hopping between nodes via PowerShell easily because most PC’s on the network would refuse the connection.

So, how could you limit which clients could connect to a host via WinRM?

You can’t limit source connections via GPO at the WinRM level. But there are two ways that you can limit conenctons. The first I mentioned earlier: limit who has administrator access to the box (or who is a member of the Remote Management Users group). The other method is to limit connection sources at the host’s firewall. I know that many admins disable the Windows Firewall as a practice because it just makes things easier. However, you need to stop that practice going forward because you are opening the nodes on your network to the greatest possible attack surface.

I want to also highlight the GPO setting “Allow remote server management through WinRM“. The usage of the setting in the screencap below can be confusing and I have to admit that I totally misunderstood its purpose the first time I researched the security settings for WinRM. This setting controls what interfaces the HOST listens on, not what clients can connect tot he host.

So, when would you use this setting?

Let’s say you had a server with multiple NIC’s and those NIC’s all served a different purpose. For example let’s say NIC1 is the PROD network, NIC2 is the backup network and NIC3 is a heartbeat network. The setting “Allow remote server management through WinRM” allows you to configure the server so that you can limit which of those NIC’s would be able to accept WinRM connections from remote hosts.

Computer Configuration > Policies > Administrative Templates: Policy definitions > Windows Components > Windows Remote Management (WinRM) > WinRM Service.
Limit which IP’s (networks) on a host can accept connections 

Logging

Logging is another area where Microsoft has given considerable flexibility in how much to log and where to store some of the log information. Keep in mind that some of the options discussed below are only available in PowerShell 5.x, so the recommendation is to upgrade all pc’s to PS 5.x so you can take advantage of all the latest and greatest security features.

PowerShell logs connection attempts and successful connections by default but does not log what commands or scripts are executed by default. The Microsoft team has given us the ability to log in great detail what happens when PowerShell is executed but you need to enable the logging options. Logging is a little bit of an art form because the more logging you turn on, the greater the chance the logging will have a negative impact on the performance of the PC.

There are three log settings that can be enabled to log activity for WinRM remote sessions:

  • Module Logging
  • Script Block Logging
  • Transcription

Module Logging

Module logging records pipeline execution details as PowerShell executes, including variable initialization and command invocations. Module logging will record portions of scripts, some de-obfuscated code, and some data formatted for output. This logging will capture some details missed by other PowerShell logging sources, though it may not reliably capture the commands executed.

Module logging has been available since PowerShell 3.0 and logged events are written to Event ID# 4103. Please be aware, module logging generates a large volume of events! The information captured is useful, especially when trying to figure out what happened during a security breach, but you will definitely blow up your security log and cause it to roll over very easily. If you have a SIEM tool that captures log data, this probably isn’t a concern for you, but if you don’t have SIEM in your org then turning on module logging may not be in your best interest.

Script Block Logging

Script block logging records blocks of code as they are executed by the PowerShell engine, thereby capturing the full contents of code executed by an attacker, including scripts and commands. Due to the nature of script block logging, it also records de-obfuscated code as it is executed. For example, in addition to recording the original obfuscated code, script block logging records the decoded commands passed with PowerShell’s -EncodedCommand argument, as well as those obfuscated with XOR, Base64, ROT13, encryption, etc., in addition to the original obfuscated code. Script block logging will not record output from the executed code.

Script block logging events are recorded in Event ID # 4104. Script blocks exceeding the maximum length of an event log message are fragmented into multiple entries. Scripts are available to re-assemble log messages split across log entries. PowerShell 5.0 will automatically log code blocks if the block’s contents match on a list of suspicious commands or scripting techniques, even if script block logging is not enabled. These suspicious blocks are logged at the “warning” level in Event ID #4104, unless script block logging is explicitly disabled.

Enabling script block logging will capture all activity, not just blocks considered suspicious by the PowerShell process. Script block logging generates fewer events than module logging but the volume still can be considerable.

Transcription

Transcription creates a unique record of every PowerShell sessionincluding all input and output, exactly as it appears in the session.

Transcripts are written to text files, broken out by user and session. Transcripts also contain timestamps and metadata for each command in order to aid analysis. However, transcription records only what appears in the PowerShell terminal, which will not include the contents of executed scripts or output written to other destinations such as the file system.

PowerShell transcripts are automatically named to prevent collisions, with names beginning with “PowerShell_transcript”. By default, transcripts are written to the user’s documents folder but can be configured to any accessible location on the local system or on the network.

I like the idea of turning on transcription and sending those logs to a file share. The logs are simple text files and are easy to read and scan at a glance if necessary. Also, since they’re just text files, they are very efficient to store and can be compressed and archived without much effort. You can setup transcription to write transcripts to a remote, write-only network share. Machines would dump log data there but only a handful of people could remove those logs.

Conclusion

I have walked you through many of the options available for PowerShell Remoting. The take away from this article hopefully is that you realize that, by default, PowerShell authentication is strong. However, detailed logging is not enabled by default. PowerShell only logs connection attempts in its default config, but there is the ability to log in great detail everything that occurs within a PowerShell session. The downside here is that turning on logging has an impact on machine performance and disk space and you will have to figure out for yourself what the best mix is for your org.

Enabling script block logging and transcription will record most activity while minimizing the amount of log data generated. At a minimum, transcription logging should be enabled, in order to identify commands run and code that was executed.

My Recommendations

Follow these recommendations and you will have a very strong security posture with respect to running PowerShell in your organization:

  • Turn on transcription logging and have logs write to a central file share
  • Lock down who has the ability to remove logs from the central share
  • Turn on script block logging and assess the impact on your PC’s
  • Module logging is also recommended but it will generate large volumes of event log data, so think carefully before enabling this setting
  • Enable a certificate infrastructure for your domain
  • Install SSL certificates on all domain computers
  • Disable the HTTP port in use for PowerShell after SSL certs have been deployed
  • Limit via GPO which PC’s can initiate PowerShell connection attempts
  • Install Windows PowerShell v5 on every node in your environment
  • Eliminate local administrators on PC’s and servers aggressively

I hope you find this practical guide useful in your research. I welcome you to leave comments below and let me know what concerns or feedback you have. If you like articles like this, don’t forget to sign up for my mailing list. I usually write one article a week and I never share your info with anyone or any business.

Preventing Network and DNS Traffic Leaks – SparkLabs

Preventing Network and DNS Traffic Leaks

A traffic “leak” is when network traffic that should only ever travel over a VPN connection instead travels over the normal network connection, thereby potentially exposing the contents of the traffic to others. This could also potentially expose your true IP address to services you are connecting to. For the vast majority of VPN users network and DNS leaks are not a concern. This article has been written for users who connect to VPN Service Providers, with all traffic directed over the VPN connection, who are concerned about the possibility of a leak occurring.

We are currently working on adding a feature to Viscosity to easily block traffic leaks from occurring. We hope to have such a feature available in a future version of Viscosity, however please be aware that this is not something that will be available soon. In the meantime this article details how you can manually setup Viscosity to prevent traffic leaks from occurring.

Traffic Leak Introduction

Most VPN Service Providers configure their VPN setup to direct all network traffic over a VPN connection while it is active. However in some situations, or for poorly configured setups, network traffic can potentially travel over the normal network connection, even if the VPN connection is active. Traffic leaks typically fall into two categories depending on how you deal with them: network leaks and DNS leaks.

A network leak can occur due to a poorly configured VPN setup (where not all traffic is routed correctly through the VPN connection), or during periods where the VPN connection is not active (for example a dropout has occurred and the VPN connection is in the process of reconnecting). To prevent network leaks it is necessary to ensure that all traffic is correctly flowing through the VPN connection when it is active, and to block network traffic from using the normal network connection when it is not active.

A DNS leak occurs when DNS requests are made to a DNS server on the local network (instead of to a DNS server over the VPN connection) potentially exposing what sites or servers your computer is accessing. This is easily avoided by overriding your local DNS servers with DNS servers that are accessed through the VPN connection.

Checking All Traffic Is Routed Over The VPN Connection

The first step to ensuring that there are no network leaks is checking that all traffic is being directed through your VPN connection while it is connected. This can be done by examining the routing on your computer while connected:

Mac

  1. Connect your VPN connection using Viscosity.
  2. Open the Terminal application. This can be easily done by entering “Terminal” into the Spotlight search field. It can also be found at “/Applications/Utilities/Terminal.app”.
  3. Enter the command “route get 0/1” and press Enter. Make a note of the “interface” entry.
  4. Enter the command “route get 128.0/1” and press Enter. Make a note of the “interface” entry.
  5. If both of the interfaces returned above start with “tun” or “tap”, all traffic is flowing through the VPN connection by default.

Windows

  1. Connect your VPN connection using Viscosity.
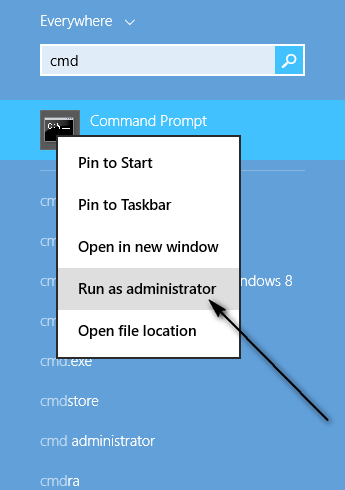
  2. Open command prompt. This can be done by pressing Windows + R, type ‘cmd’ into the new dialog and click OK, or go to Start, type ‘cmd’ into search and open Command Prompt.
  3. Enter the command “tracert 1.2.3.4” and press Enter. Let the first hop complete, and take note of the IP Address that appears on the right. You can press ctrl+c to cancel the tracert once the first hop is complete.
  4. Open the Viscosity Details window and select the active connection. If the Client IP that appears in the details window matches, or the first three octets (first three dot parts) of the IP match, all traffic is flowing through the VPN connection by default.
  5. If not, type ‘route print’ into command prompt and locate the IPv4 Route table. If you can locate the IP address returned by tracert under Network Destination, and the Interface value is the same as the Client IP displayed by Viscosity, all traffic is flowing through the VPN connection by default.

If you find that all network traffic isn’t routed through the VPN connection you can change this behaviour like so:

  1. From the Viscosity menu select Preferences to open Viscosity’s Preferences window.
  2. Select your connection from the Connections list and click the Edit button.
  3. Click on the Networking tab. Tick the “Send all traffic over VPN connection” checkbox.
  4. Click the Save button.

Preventing Network Leaks When A Drop-out/Disconnect Occurs

If a VPN connection drops, your computer may use your normal network connection until the VPN connection is re-established. In most cases this is desired behaviour, however to prevent network leaks it is recommended that all traffic is blocked when a drop-out or disconnect occurs. This can most easily be achieved by the scripting technique below. For this technique to work, please ensure the “Reset network interfaces on disconnect” option is disabled under Preferences->Advanced.

Viscosity 1.7.1 and later have a new option that allows you to use OpenVPN scripts without needing to enable Unsafe Commands. These scripts are run elevated which means you do not need to put your credentials into AppleScripts or run Viscosity Windows as an Administrator. For security, the scripts used by this method must be in a designated area in your file system, and must be locked down so they can only be edited by an elevated or administrative user.

Mac

To get started, you will need to enable the AllowOpenVPNScripts option in Viscosity. To enable this option run the following command in the Terminal (/Applications/Utilities/Terminal) application and enter your administrator details when prompted:

/Applications/Viscosity.app/Contents/MacOS/Viscosity -setSecureGlobalSetting YES -setting AllowOpenVPNScripts -value YES

Next, you’ll need to create a script that disables the network connection when a drop-out occurs. You can write a custom shell script in any language supported by macOS, however we recommend using the example script below to get started. This script will automatically disable all active network connections, and it’s not necessary to make any changes to it.

#!/usr/bin/python
import subprocess, re
services = re.findall("\(\d+?\) (.+?)\n\(Hardware Port: (.+?), Device: (.+?)\)\n",
  subprocess.check_output(["/usr/sbin/networksetup", "-listnetworkserviceorder"]))
for service in services:
  if service[1] == "Wi-Fi":
    subprocess.check_output(["/usr/sbin/networksetup", "-setairportpower", service[2], "off"])
  else:
    subprocess.check_output(["/usr/sbin/networksetup", "-setnetworkserviceenabled", service[0], "off"])

To use it copy-paste the code above into a new document in a text editor (such as TextEdit), and save it as a text file to your Desktop with the name “disablenetwork.py”. If using the TextEdit application please make sure it’s saved as plain text by going to the “Format” menu and selecting “Make Plain Text” before saving.

Next you will need to create the folder where the script will be stored, and then copy your script into this location. This can be achieved by running the following commands in the Terminal. Enter your administrator password when requested.

sudo mkdir "/Library/Application Support/ViscosityScripts"
sudo cp ~/Desktop/disablenetwork.py "/Library/Application Support/ViscosityScripts"
sudo chown -R root:wheel "/Library/Application Support/ViscosityScripts"
sudo chmod -R 755 "/Library/Application Support/ViscosityScripts"

Before adding the script to your VPN connection it’s recommend you test it manually to ensure it works as intended. To do this run the following command in the Terminal. If it works your network connection/s should become disabled. If not it means there is a problem in the script or it has not been copied into the correct location.

sudo "/Library/Application Support/ViscosityScripts/disablenetwork.py"

Now you’re ready to add it to your connection in Viscosity. To set the script, edit your connection, go to the Advanced tab, and on a new line add the following command, then click Save:

route-pre-down "/Library/Application\\ Support/ViscosityScripts/disablenetwork.py"

The “route-pre-down” command ensures our script is run before the VPN network’s routing is removed to prevent packet leaks. Other commands that can be used for running scripts at different times include “up”, “down”, and “route-up”. More information on these commands can be found in the Advanced Configuration Commands article.

And that’s it. You can test what happens when your VPN connection drops out by manually disconnecting your VPN connection.

To re-enable a wired (Ethernet) connection after this script has been run simply open up System Preferences and select the “Make Service Active” option. To re-enable a Wi-Fi (Airport) connection simply go to the Wi-Fi icon in the menu bar and select “Turn Wi-Fi On”.

Windows

To get started, you will need to enable the AllowOpenVPNScripts option in Viscosity. To enable this option you will require Administrator rights on your computer. Run the following from Start -> Run, or a command prompt, and click Yes to the User Account Control (UAC) prompt that appears:

"C:\Program Files\Viscosity\Viscosity.exe" SetPref AllowOpenVPNScripts true

Next, you’ll need to create a script that disables the network connection when a drop-out occurs. On Windows you should use a batch (*.bat) script, however any script Windows can run natively is supported. We recommend using the script below which disables your network interface to get started:

netsh interface set interface "Ethernet" admin=DISABLED

To use this script copy-paste the code above into a new document in a text editor (we recommend using Notepad++, but Notepad is fine). You will need to replace “Ethernet” with the name of your network adapter. This could be “Wi-Fi” if you use a wireless network, or “Local Area Connection” on older versions of Windows, however on most modern PCs it is named “Ethernet” for a wired connection. To disable more than one adapter, simply copy-paste the script again onto a new line and replace “Ethernet” with the name of the second adapter.

Once you have finished making changes, save it to your Documents or Desktop as “disable-network.bat”. You will need to enable the interface manually when you want to use your internet connection or reconnect to a VPN.

Once your script is created, copy (do not move or drag/drop the script file) to the following directory. You may have to create this directory first if it does not already exist. To do this, open an Explorer window and navigate to your main disk drive, then go into Program Files, then Common Files. If the Viscosity folder does not exist, right click in empty space, select New -> Folder, click Continue when prompted to provide Administrator rights, then rename the folder ‘Viscosity’. Then enter the Viscosity folder and repeat these steps to create a folder ‘Scripts’.

C:\Program Files\Common Files\Viscosity\Scripts

Replace ‘C:\’ above and in the following steps if your main disk drive where Windows is installed has a different drive letter.

Before adding the script to your VPN connection it’s recommended you test it manually to ensure it works as intended. To do this, open a Command Prompt as Administrator and run the script with the following command. If it works, your network adapter/s should become disabled and you will not longer be able to access the internet. If it does not there is a problem or the script has not been copied to the correct location.

"C:\Program Files\Common Files\Viscosity\Scripts\disable-network.bat"

Now you’re ready to add it to your connection in Viscosity. To set the script, edit your connection, go to the Advanced tab and on a new line add the script command, then click Save. Ensure that the path is complete and quoted, on Windows, backslashes need to be doubled as below.

route-pre-down "C:\\Program Files\\Common Files\\Viscosity\\Scripts\\disable-network.bat"

The “route-pre-down” command ensures our script is run before the VPN network’s routing is removed to prevent packet leaks. Other commands that can be used for running scripts at different times include “up”, “down”, and “route-up”. More information on these commands can be found in the Advanced Configuration Commands article.

And that’s it. You can test what happens when your VPN connection drops out by manually disconnecting your VPN connection.

To re-enable your disabled network adapter/s after this script has been run, go to Control Panel -> Network and Sharing Center -> Change adapter settings (on the left), right click your adapter and select Enable.

Preventing IPv6 Network Leaks

Many modern Internet Service Providers are beginning to offer both IPv4 (IP version 4) and IPv6 (IP version 6) connectivity on their networks. However if your VPN connection is not configured to take this into account it’s possible to leak IPv6 traffic.

Most users are familiar with IPv4 addresses, which are represented as a series of numbers in the format x.x.x.x. IPv4 has long been the default IP version for the Internet and local networks. However the number of available unique IPv4 addresses is limited and has almost run out. IPv6 is designed to solve this problem by offering many more unique addresses. Hence Internet Service Providers are beginning to enable IPv6 on their networks as an eventual replacement for IPv4. An IPv6 address consists of a series of letters and numbers separated by colons, for example 2001:db8:85a3::8a2e:370:7334.

However many VPN Providers have been slow to adopt IPv6 support through their VPN networks. This means that if your ISP provides IPv6, however your VPN connection only supports IPv4 traffic, IPv6 traffic can still go over your normal network connection even while connected to a VPN.

VPN Providers can easily solve this problem, while also preparing for the future, by enabling support for IPv6 traffic through their networks. However if your VPN Provider only supports IPv4 it is possible to block IPv6 traffic while connected to the VPN.

Viscosity provides an option which blocks IPv6 traffic while you are connected to a VPN which does not support IPv6. To enable this option, open Preferences and go to the Advanced Tab, then tick “Block IPv6 traffic while connected to IPv4-only VPN connections”.

You will need to reconnect any connections after changing this option.

If you are unsure if your normal network connection supports IPv6 you can use an IPv6 test connectivity test such as Test IPv6.

Preventing DNS Leaks

DNS leaks can be preventing by ensuring that Viscosity’s DNS support is enabled for your connection, and that a DNS server has been set. For information on how to check that it is enabled and specify DNS servers please see the Configuring DNS and WINS settings article.

Windows Multi-Homed DNS

By default, Windows uses a DNS resolution technique called multi-homed DNS. A very simple explanation of this is Windows will ask every DNS server defined on the system to resolve an address, and send these requests out of ever adapter on the system, and then use the first response. This is quite bad for anonymity and effectively means all DNS lookups leak using Windows default DNS system.

Viscosity for Windows uses it’s own DNS system when you are connected to a VPN to prevent this. However, some users prefer the multi-homed Windows DNS system for various reasons. For this, we have an option available in Preferences -> Advanced called “Use Windows DNS System for Full DNS”. Simply tick this option before connecting to a VPN which uses Full DNS mode and the Windows DNS system will be used instead of Viscosity’s.

Are There Any Third Party Tools For This?

Most firewall software will allow rules to be put in place to block traffic from leaking. Any such rules should block all traffic on the standard network interface with the exception of traffic for the VPN connection itself.

Source: Preventing Network and DNS Traffic Leaks – SparkLabs

Error Trapping and Handling in PowerShell

How to use the Trap and Try…Catch…Finally constructs

Don Jones | Jul 20, 2010

Sometimes when something goes wrong in Windows PowerShell, it isn’t a bad thing. That is, there are certain conditions that you can anticipate and potentially deal with, such as a missing file or a computer that can’t be contacted over the network. In response, you might want to prompt the user for an action to take or just log the error so that you can try again later. Windows PowerShell makes this possible through a scheme called error trapping and handling.

First, You Need an Error

To trap and handle an error, you actually need one to occur. Technically, in PowerShell terminology, you need an exception to occur. That can actually be a little tricky to do, believe it or not. For example, try running the following command. It will fail, but pay attention to what happens:

Get-WmiObject Win32_BIOS -comp 'localhost','not-here'

First, you should see the Win32_BIOS instance from your local computer. Then, you should see an error message (unless you actually have a computer named not-here on your network). Think you’ve seen an exception? Wrong. In PowerShell, just because you’ve seen an error message doesn’t mean an exception was created. You can’t trap or handle an error message. You can only trap and handle exceptions.

What you just saw was an example of a non-terminating exception. That is, an exception really did happen, but it wasn’t so bad that the cmdlet needed to stop executing. So the cmdlet basically held the exception deep inside, suppressing its feelings of failure, and continued trying to do what you’d asked. You can’t help the cmdlet if it isn’t going to be more open with its feelings. In other words, you can’t trap and handle non-terminating exceptions. Many of the problems a cmdlet can run into will typically generate a non-terminating exception. That’s because cmdlets don’t want folks to start calling them crybabies, so if something moderately bad happens, they just shut up and keep going.

This cmdlet behavior is controlled by a built-in PowerShell variable named $ErrorActionPreference. You can view its contents by simply typing the variable’s name at the command line:

$ErrorActionPreference

By default, it’s set to Continue, which is what cmdlets do when they encounter a non-terminating error—they keep going. The cmdlets also display error messages by default, but you can shut them off by setting $ErrorActionPreference to SilentlyContinue. Try it:

$ErrorActionPreference = "SilentlyContinue"
Get-WmiObject Win32_BIOS -comp 'localhost','not-here'

This time, the failure occurred but not a word was said about it. Our cmdlet just bit its lip and kept on going, not so much as whimpering about the error. Now, this is where a lot of new PowerShell users go wrong, so I need you to picture me standing up on a table and screaming, “Do not set $ErrorActionPreference to SilentlyContinue just to make the error messages go away.”

Error messages are, by and large, good things. They tell us what’s broken. They’re like the nerves in your fingertips that tell you the stove you’re about to touch is very hotPeople who have problems with those nerves often burn themselves. We usually want to see error messages. What we don’t want to see are the error messages that we can anticipate and deal with on our own.

Just Cry Out Loud

When you anticipate a cmdlet running into a problem that you want to deal with, you need to tell that cmdlet to stop bottling up its emotions. You’re not doing this for every cmdlet across the shell, but just for a specific cmdlet that you know you can handle. Since you don’t want to make a global behavior change, you should leave $ErrorActionPreference set to Continue. Instead, you can modify the error action for just one cmdlet.

Every cmdlet in PowerShell supports a set of common parameters, one of which is -ErrorAction (which can be abbreviated -ea). It accepts the same values as $ErrorActionPreference, including stop, which tells the cmdlet to turn a non-terminating exception into a terminating exception—and terminating exceptions are ones you can trap and handle. For this example, you’d run the command

Get-WmiObject Win32_BIOS -comp 'localhost','not-here' -ea stop

Tricky Traps

The first way you can trap an error is to use a Trap construct. Listing 1 shows an example of a trap that’s defined within a function. This code works in PowerShell 1.0 as well as PowerShell 2.0.

Function Do-Something {
  Trap {
    Write-Host 'Error in function' -fore white -back red
    Continue
  }
  Write-Host 'Trying' -fore white -back black
  gwmi Win32_BIOS -comp localhost,not-here -ea stop
  Write-Host 'Tried' -fore white -back black
}

Write-Host 'Starting' -fore white -back green
Do-Something
Write-Host 'Ending' -fore white -back green

Figure 1 shows the output from the code in Listing 1. As you can see, PowerShell first displayed the line Starting. It then executed the function, which displayed the line Trying.

Results from the Trap construct in Listing 1
Figure 1: Results from the Trap construct in Listing 1

Next, PowerShell ran Get-WmiObject, which can be abbreviated as gwmi. It first ran this cmdlet against localhost, and you can see the Win32_BIOS output. But it ran into a problem trying to contact not-here, so an exception occurred. The -ea stop parameter turned that into a terminating exception, so PowerShell looked for a Trap construct within the same scope. It found one inside the function and executed it. That’s why Error in functiondisplayed. The trap finished with the Continue statement, which kept the execution inside the same scope (i.e., inside the function), and Tried was displayed. Finally, the function exited and Ending was displayed.

Traps can be tricky because they are their own scope. Specifically, they’re a child of whatever scope they live in. Consider the modified Trap construct in Listing 2.

Function Do-Something {
  Trap {
    Write-Host 'Error in function' -fore white -back red

# BEGIN CALLOUT A
    $test = 'Two'
# END CALLOUT A
    Continue
  }
  $test = 'One'
  Write-Host "Trying $test" -fore white -back black
  gwmi Win32_BIOS -comp localhost,not-here -ea stop
  Write-Host "Tried $test" -fore white -back black
}

Write-Host 'Starting' -fore white -back green
Do-Something
Write-Host 'Ending' -fore white -back green

Figure 2 shows the output from this version, and I want you to follow the value of the $test variable.

Results from the problematic Trap construct in Listing 2
Figure 2: Results from the problematic Trap construct in Listing 2

The script set the $test variable to One, and that’s displayed in the Trying One output. When the exception occurred, the trap set the $test variable to Two. However, when the trap exited, the output still displayed Tried One. What happened? As a child scope, a trap can access its parent’s variables for reading only. So, when the trap tried to modify $test, it actually created a new local $test variable, which means that $test from the parent scope (i.e., the function) was never changed. This is a real bummer if you want your trap to modify something so that your script can continue. There are ways to remedy this. For example, you can replace the command in callout A in Listing 2 with the following command to change the variable’s contents:

Set-Variable -name test -value 'Two' -scope 1

The -scope parameter treats scope 0 as the local scope, which is within the trap. The next scope up—the trap’s parent—is scope 1. So by changing test in scope 1, you’re modifying the variable that had been set to One. Note that when you use the Set-Variable cmdlet (as well as the other -Variable cmdlets), you don’t use a dollar sign ($) when specifying a variable’s name. 

There’s one more tricky bit about traps that I want to share. Take a look at the alternative Trap construct in Listing 3.

Trap {
  Write-Host 'Error in script' -fore white -back red
  Continue
}
Function Do-Something {
  Trap {
    Write-Host 'Error in function' -fore white -back red
    Break
  }
  Write-Host "Trying" -fore white -back black
  gwmi Win32_BIOS -comp localhost,not-here -ea stop
  Write-Host "Tried" -fore white -back black
}

Write-Host 'Starting' -fore white -back green
Do-Something
Write-Host 'Ending' -fore white -back green

What I’ve done is defined a trap within the script itself, prior to the function’s definition. I’ve also modified the trap within the function to use a Break statement rather than a Continue statement. The Break statement forces the trap to exit the scope in which the error occurred (in this case, the function) and to pass the exception to the parent scope, which is the script. The shell will then look to see if a trap exists in that scope, and I have indeed defined one.

Figure 3 shows what the results look like.

Results from the alternative Trap construct in Listing 3
Figure 3: Results from the alternative Trap construct in Listing 3

When the exception occurred in the function, its trap executed and “broke out of” the function. The exception was passed to the script, so its trap executed. Notice that Tried isn’t displayed. That’s because the function exited before that command could run. All you see is Ending, which is the last line in the script. Although the script’s trap concludes with the Continue statement, all it does is keep the shell’s execution in the same scope (i.e., the script). The shell can’t dive back into the function; it broke out of the function and is out for good unless you call the function afresh.

As this example shows, you can include more than one Trap construct in a script. This means you can set different traps for different types of errors. To get more details, run the command

Help about_Trap

if you’re using PowerShell 2.0. Although PowerShell 1.0 supports the Trap construct, there isn’t a Help file for it. So, if you’re using PowerShell 1.0, you need to access the information at technet.microsoft.com/en-us/library/dd347548.aspx.

Try a Different Approach

Frankly, I find the Trap construct and its scope rules pretty confusing. Fortunately, PowerShell 2.0 offers an alternative: the Try…Catch…Finally construct, which Listing 4 shows.

Try {
  gwmi Win32_BIOS -comp localhost,not-here -ea stop
} Catch {
  Write-Host 'Something bad happened' -fore white -back red
} Finally {
  Write-Host 'Glad that is over'
}

As you can see, you put the command that might fail in the Try block and the command that deals with the failure in the Catch block. You can even add a Finally block that will execute whether or not an error occurred.

Within the Catch block, you can do almost anything, including writing to log files, logging an event log entry, and sending email messages. It’s even possible to create multiple Catch blocks, each of which deals with a certain kind of error. In PowerShell 2.0, you can run the command

Help about_Try_Catch_Finally

for more details.

What’s Your Preference?

In PowerShell 1.0, you must use the Trap construct to trap and handle errors. In PowerShell 2.0, you have a choice between the Trap and Try…Catch…Finally constructs. I prefer using the latter. Not only is the Try…Catch…Finally construct easier to use, but it also keeps the error-handling logic closer to the location of the command that might fail. If you’re using PowerShell 1.0 and you often need to catch and handle exceptions, you might consider upgrading to PowerShell 2.0 so that you can take advantage of this new error trapping and handling tool.

Source: Error Trapping and Handling in PowerShell

Hide OneDrive from File Explorer – Power Tips – PowerTips – IDERA Community

Are you tired of OneDrive icons polluting your file explorer tree view? If you don’t use OneDrive, then here are two handy functions that hide and show the OneDrive icons in File Explorer:

function Disable-OneDrive
{
  $regkey1 = 'Registry::HKEY_CLASSES_ROOT\CLSID\{018D5C66-4533-4307-9B53-224DE2ED1FE6}'
  $regkey2 = 'Registry::HKEY_CLASSES_ROOT\Wow6432Node\CLSID\{018D5C66-4533-4307-9B53-224DE2ED1FE6}'
    Set-ItemProperty -Path $regkey1, $regkey2 -Name System.IsPinnedToNameSpaceTree -Value 0
}


function Enable-OneDrive
{
    $regkey1 = 'Registry::HKEY_CLASSES_ROOT\CLSID\{018D5C66-4533-4307-9B53-224DE2ED1FE6}'
    $regkey2 = 'Registry::HKEY_CLASSES_ROOT\Wow6432Node\CLSID\{018D5C66-4533-4307-9B53-224DE2ED1FE6}'
    Set-ItemProperty -Path $regkey1, $regkey2 -Name System.IsPinnedToNameSpaceTree -Value 1
}

Source: Hide OneDrive from File Explorer – Power Tips – PowerTips – IDERA Community

Start / Stop / Enable / Disable Terminal services from command line

We can start Terminal Services by running the command given below.

net start TermService

If the service is already running you will get the message ‘The requested service has already been started.
Sometimes you may get an error that the service could not be started.

C:\>net start termservice
The Terminal Services service is starting.
The Terminal Services service could not be started.
The service did not report an error.
More help is available by typing NET HELPMSG 3534.

This happens when Terminal Services is disabled through registry hack. You can fix this by running the below registry change command.

reg add "HKEY_LOCAL_MACHINE\SYSTEM\CurrentControlSet\Control\Terminal Server" /v TSEnabled /t REG_DWORD /d 1 /f

You need to reboot the computer for the changes to take effect. After reboot terminal services starts automatically or you can start the service using net start command as mentioned above.

How to stop Terminal Services?

Terminal Services can’t be stopped like other services.  You get the below error when you attempt the same.

C:\>net stop termservice
The requested pause or stop is not valid for this service.

How to restart Terminal services?

Since Terminal Services can’t be stopped there is no straightforward way we can do this. Microsoft says this is by design. But in some cases restarting terminal services could be possible by killing the svchost process that runs the terminal services.We can use tasklist and taskkill commands for this.

First get the process id of the terminal services process

 tasklist /svc | findstr /C:TermService

Check if Terminal services is the only service running in this svchost. If the svchost is shared with other services then you can stop reading further. Restarting terminal services is not possible on your machine.

On my system I have got the following output.

C:\>tasklist /svc | findstr /C:TermService
svchost.exe                 1708 DcomLaunch, TermService
C:\>
As you can see DcomLaunch and TermServiceboth share the same svchost process. In this case I can't kill the process as it stops the other service also. (Note that DcomLaunch is an essential service on the system and killing it can even shutdown the system)
In the case of svchost not being shared with any other service you can go ahead and kill TermService process by the following command.
taskkill /F /PID  process_id

How to disable Terminal Services?

We can run the below command to disable terminal services.

sc config TermService start= disabled

How to enable Terminal Services?

sc config TermService start= auto

(or)

sc config TermService start= demand

Source: Start / Stop / Enable / Disable Terminal services from command line